


I Bet Your 12 Year Old Can't Tell Time
Ziggy to the rescue

This may be an overgeneralization (I only sampled two subjects and watched Jimmy Kimmel) but I don’t think elementary schools teach children how to tell time very well. Sigfried and Therese Engelmann’s method described here is appropriate for children aged 5 and up. For older children you may not have to complete every step. For example, they may know the concepts of before and after already. Read and decide for yourself. You may draw the clocks as he suggests but I’ve used a Teacher’s Choice clock that has the minutes located outside the face and a minute hand that is extra long to point to the minutes. When you are teaching the purpose of the minute hand or the hour hand, cover the other. Later on in the program, you will use a clock without the minutes outside the face, but rather with markers for minutes.
I’ve rephrased parts of the program, but for the most part, the program is quoted directly from their book, Give Your Child A Superior Mind (1963) pages 237-244. The book is out of print and difficult to find, so I present it to you here. I’ve read a variety of telling time programs, this is the best one I know of.
Telling Time
It is quite difficult for a child to tell time. Mary must learn when a 3 is a 3 and when a 3 is a 15; when to say X number of minutes after the hour, and when to say X number of minutes before the next hour. Englemann breaks the task down into small steps. He suggests teaching each step in the order that follows. Make sure the child masters each step before moving to the next one.
Step 1. Teach the hours. Tell Mary you are going to teach her how to tell time. Draw a large circle. Put four numbers inside the clock (12,3,6,9). Have the child point to the position of the numbers.
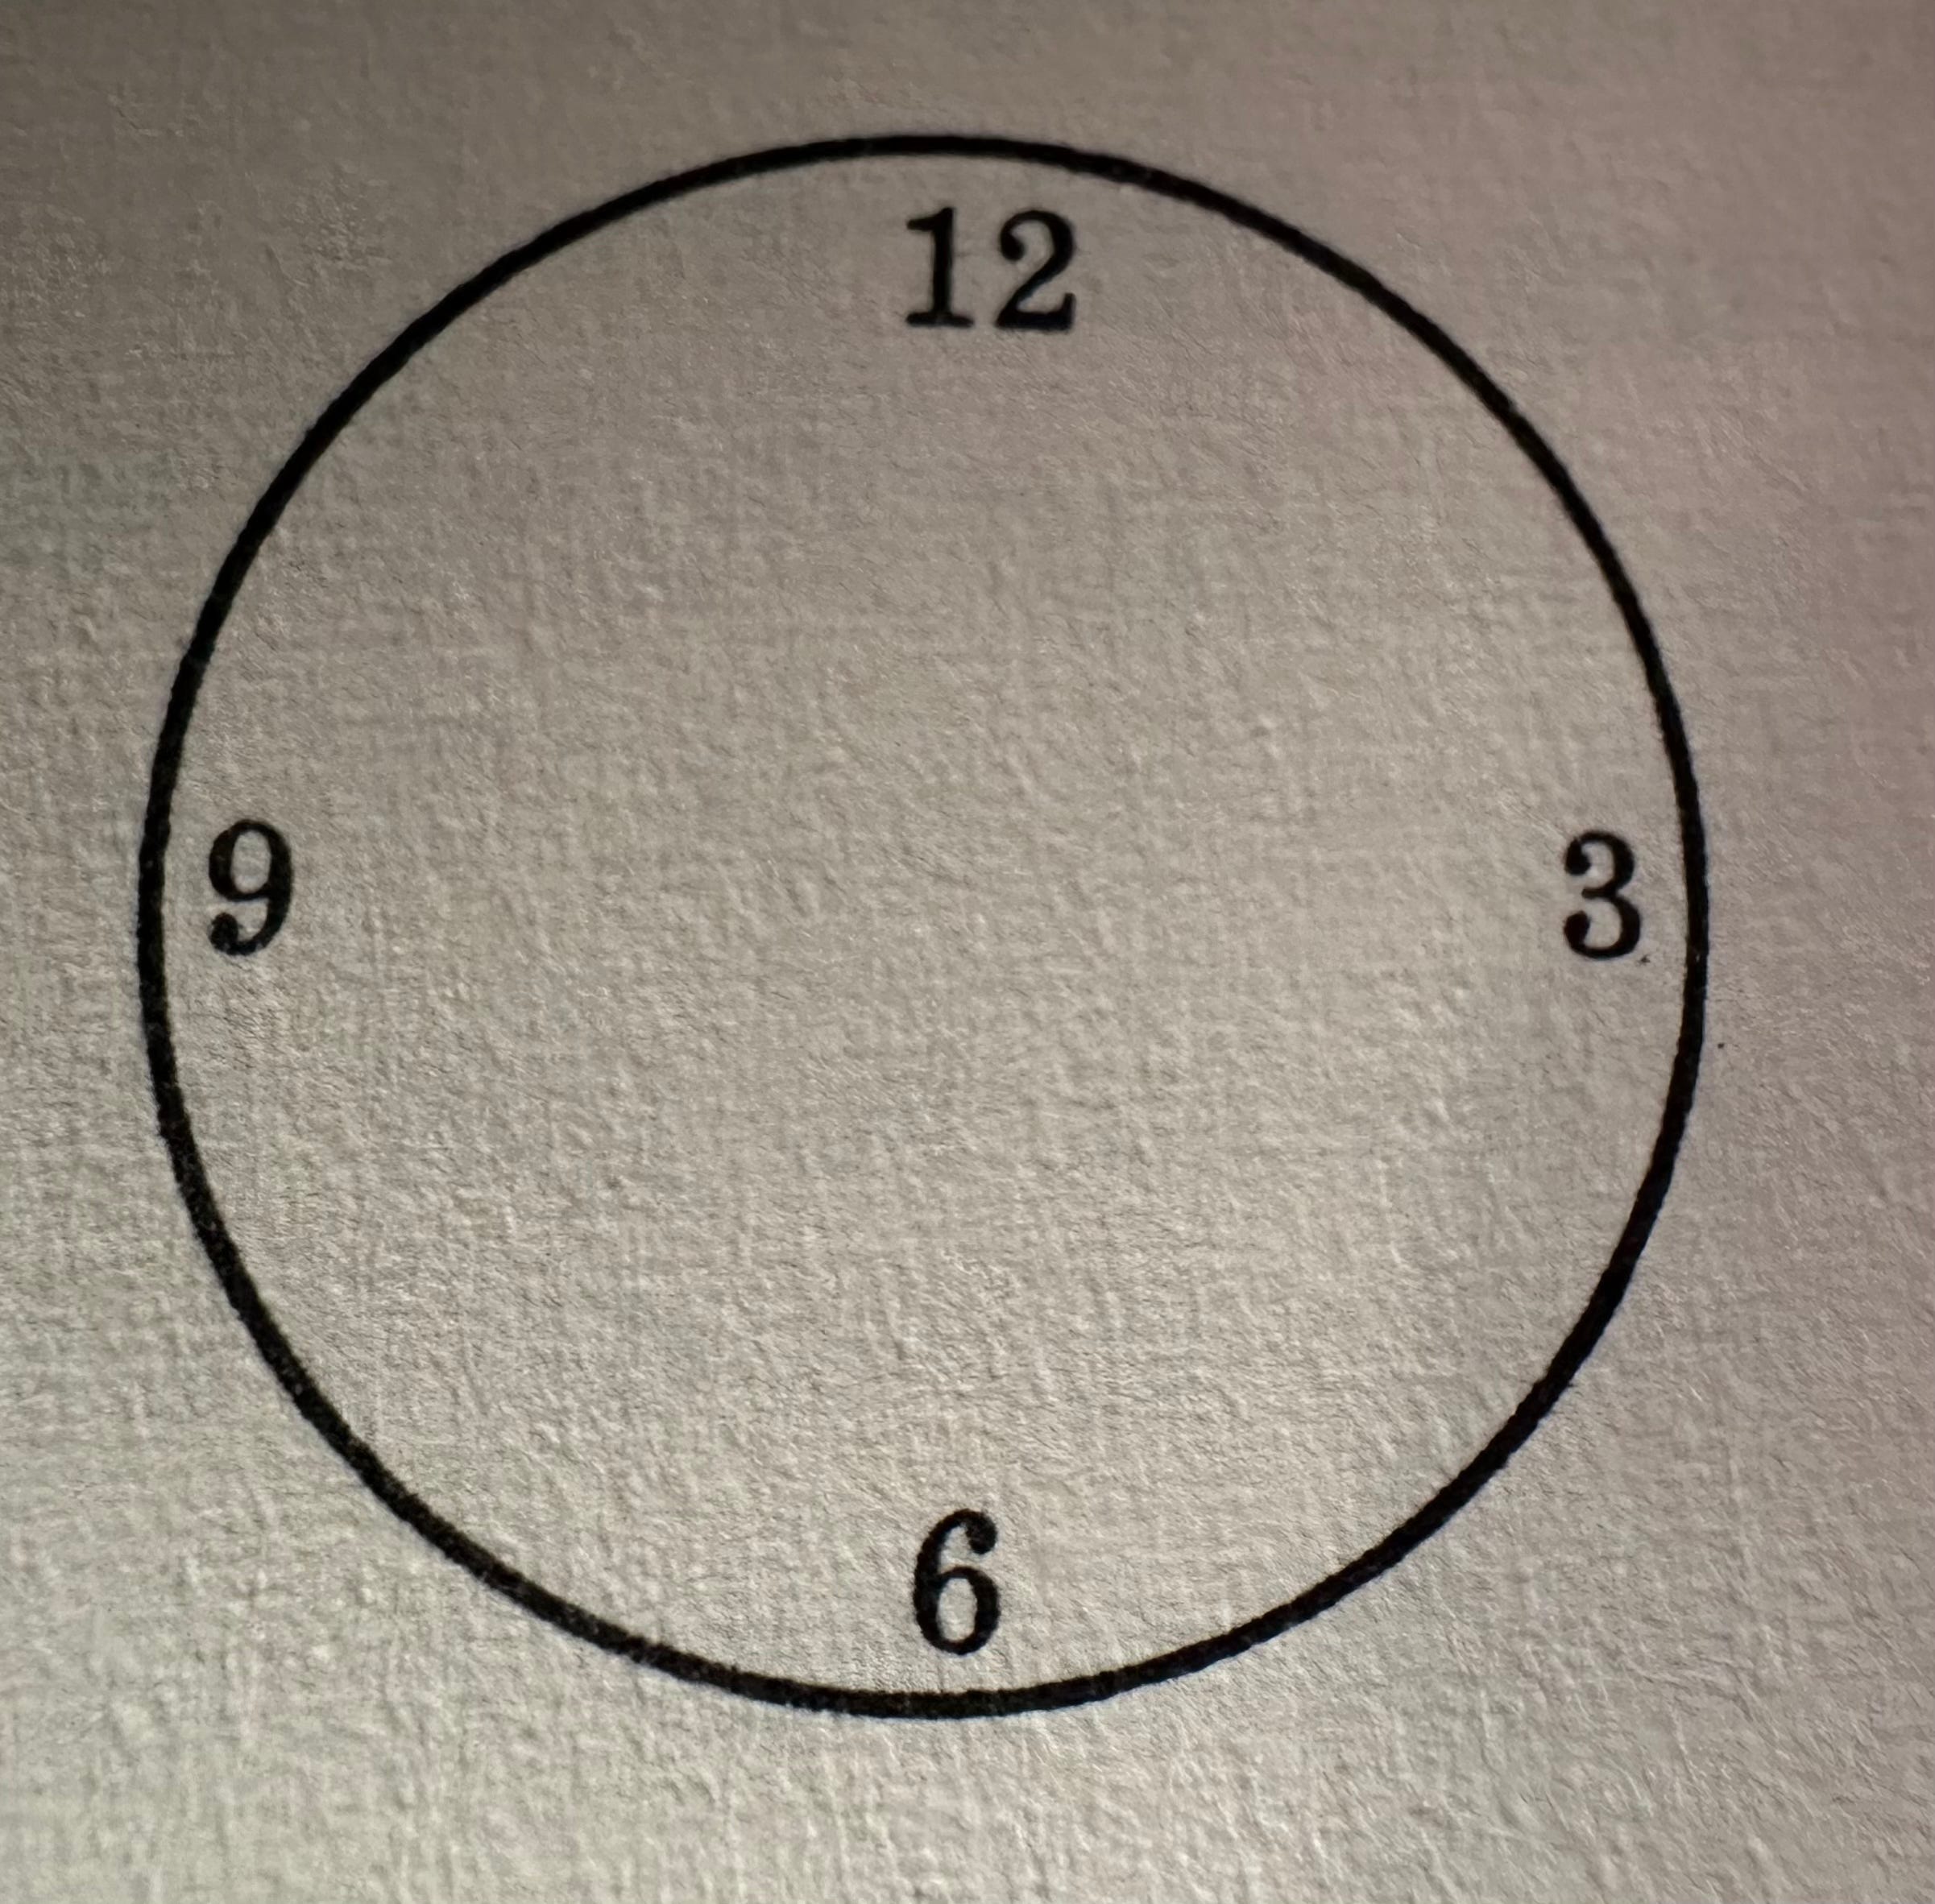
Say, “Remember the 12 is always at the top, here. The 3 is always here. The six is always here at the bottom. The nine is always here on the side”. Then present another circle and ask the child if they can put the numbers (12,3,6,9) inside the circle. Have Mary do it. Then you write in the other numbers. So, the clock looks like this:
Say, “There are 12 hours on a clock and the 12 is always on the top”.
Step 2. The hands. Say, “These are the hands of a clock. The big hand is called the minute hand; the small hand is called the hour hand. To emphasize this rule, draw a clock with the minute hand extending past the face of the clock, like this:
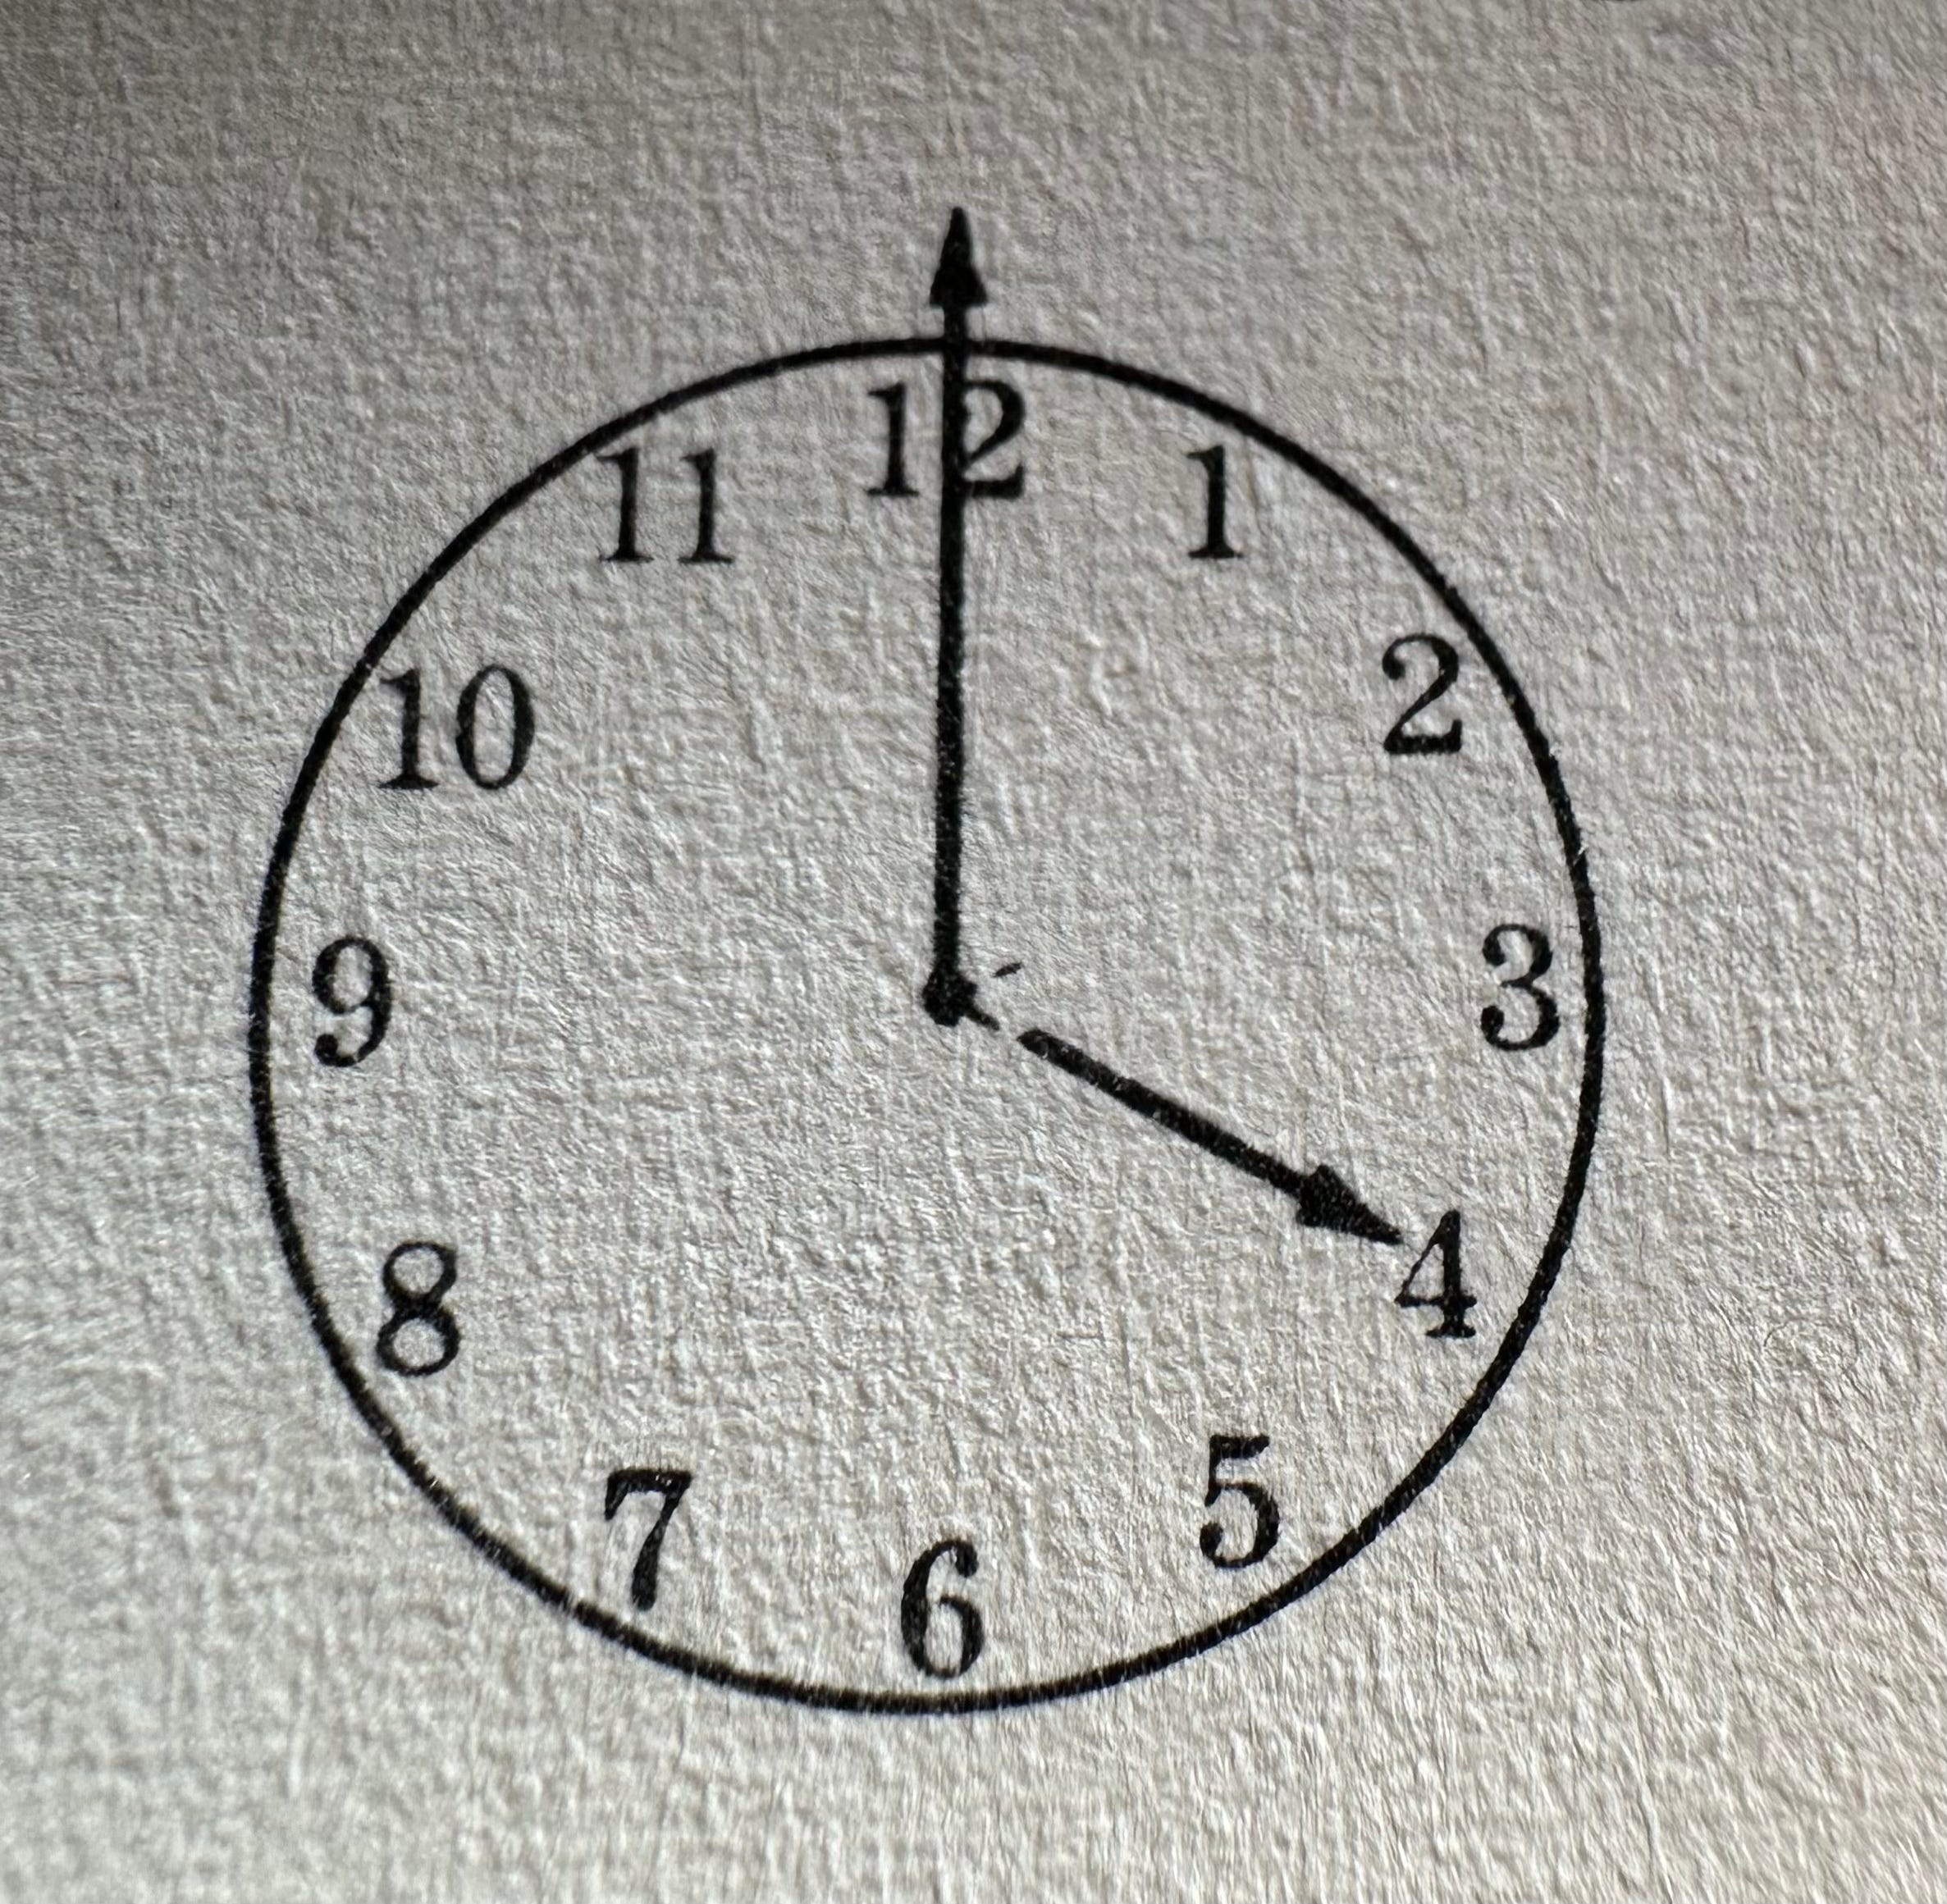
Say, “Look, the hour hand points to the numbers on the clock but the minute hand does not. The hour hand is pointing to 4 so it’s 4 o’clock”. Then draw the hour hand in different positions. Repeat the rule. “The shorter hand is the hour hand. The hour hand points to the numbers on the clock. If it points to 6 it is 6 o’clock”. “What time does the hour hand point to now?, and now?” Draw a clock with just an hour hand. Draw the hand in different positions and ask what hour it is.
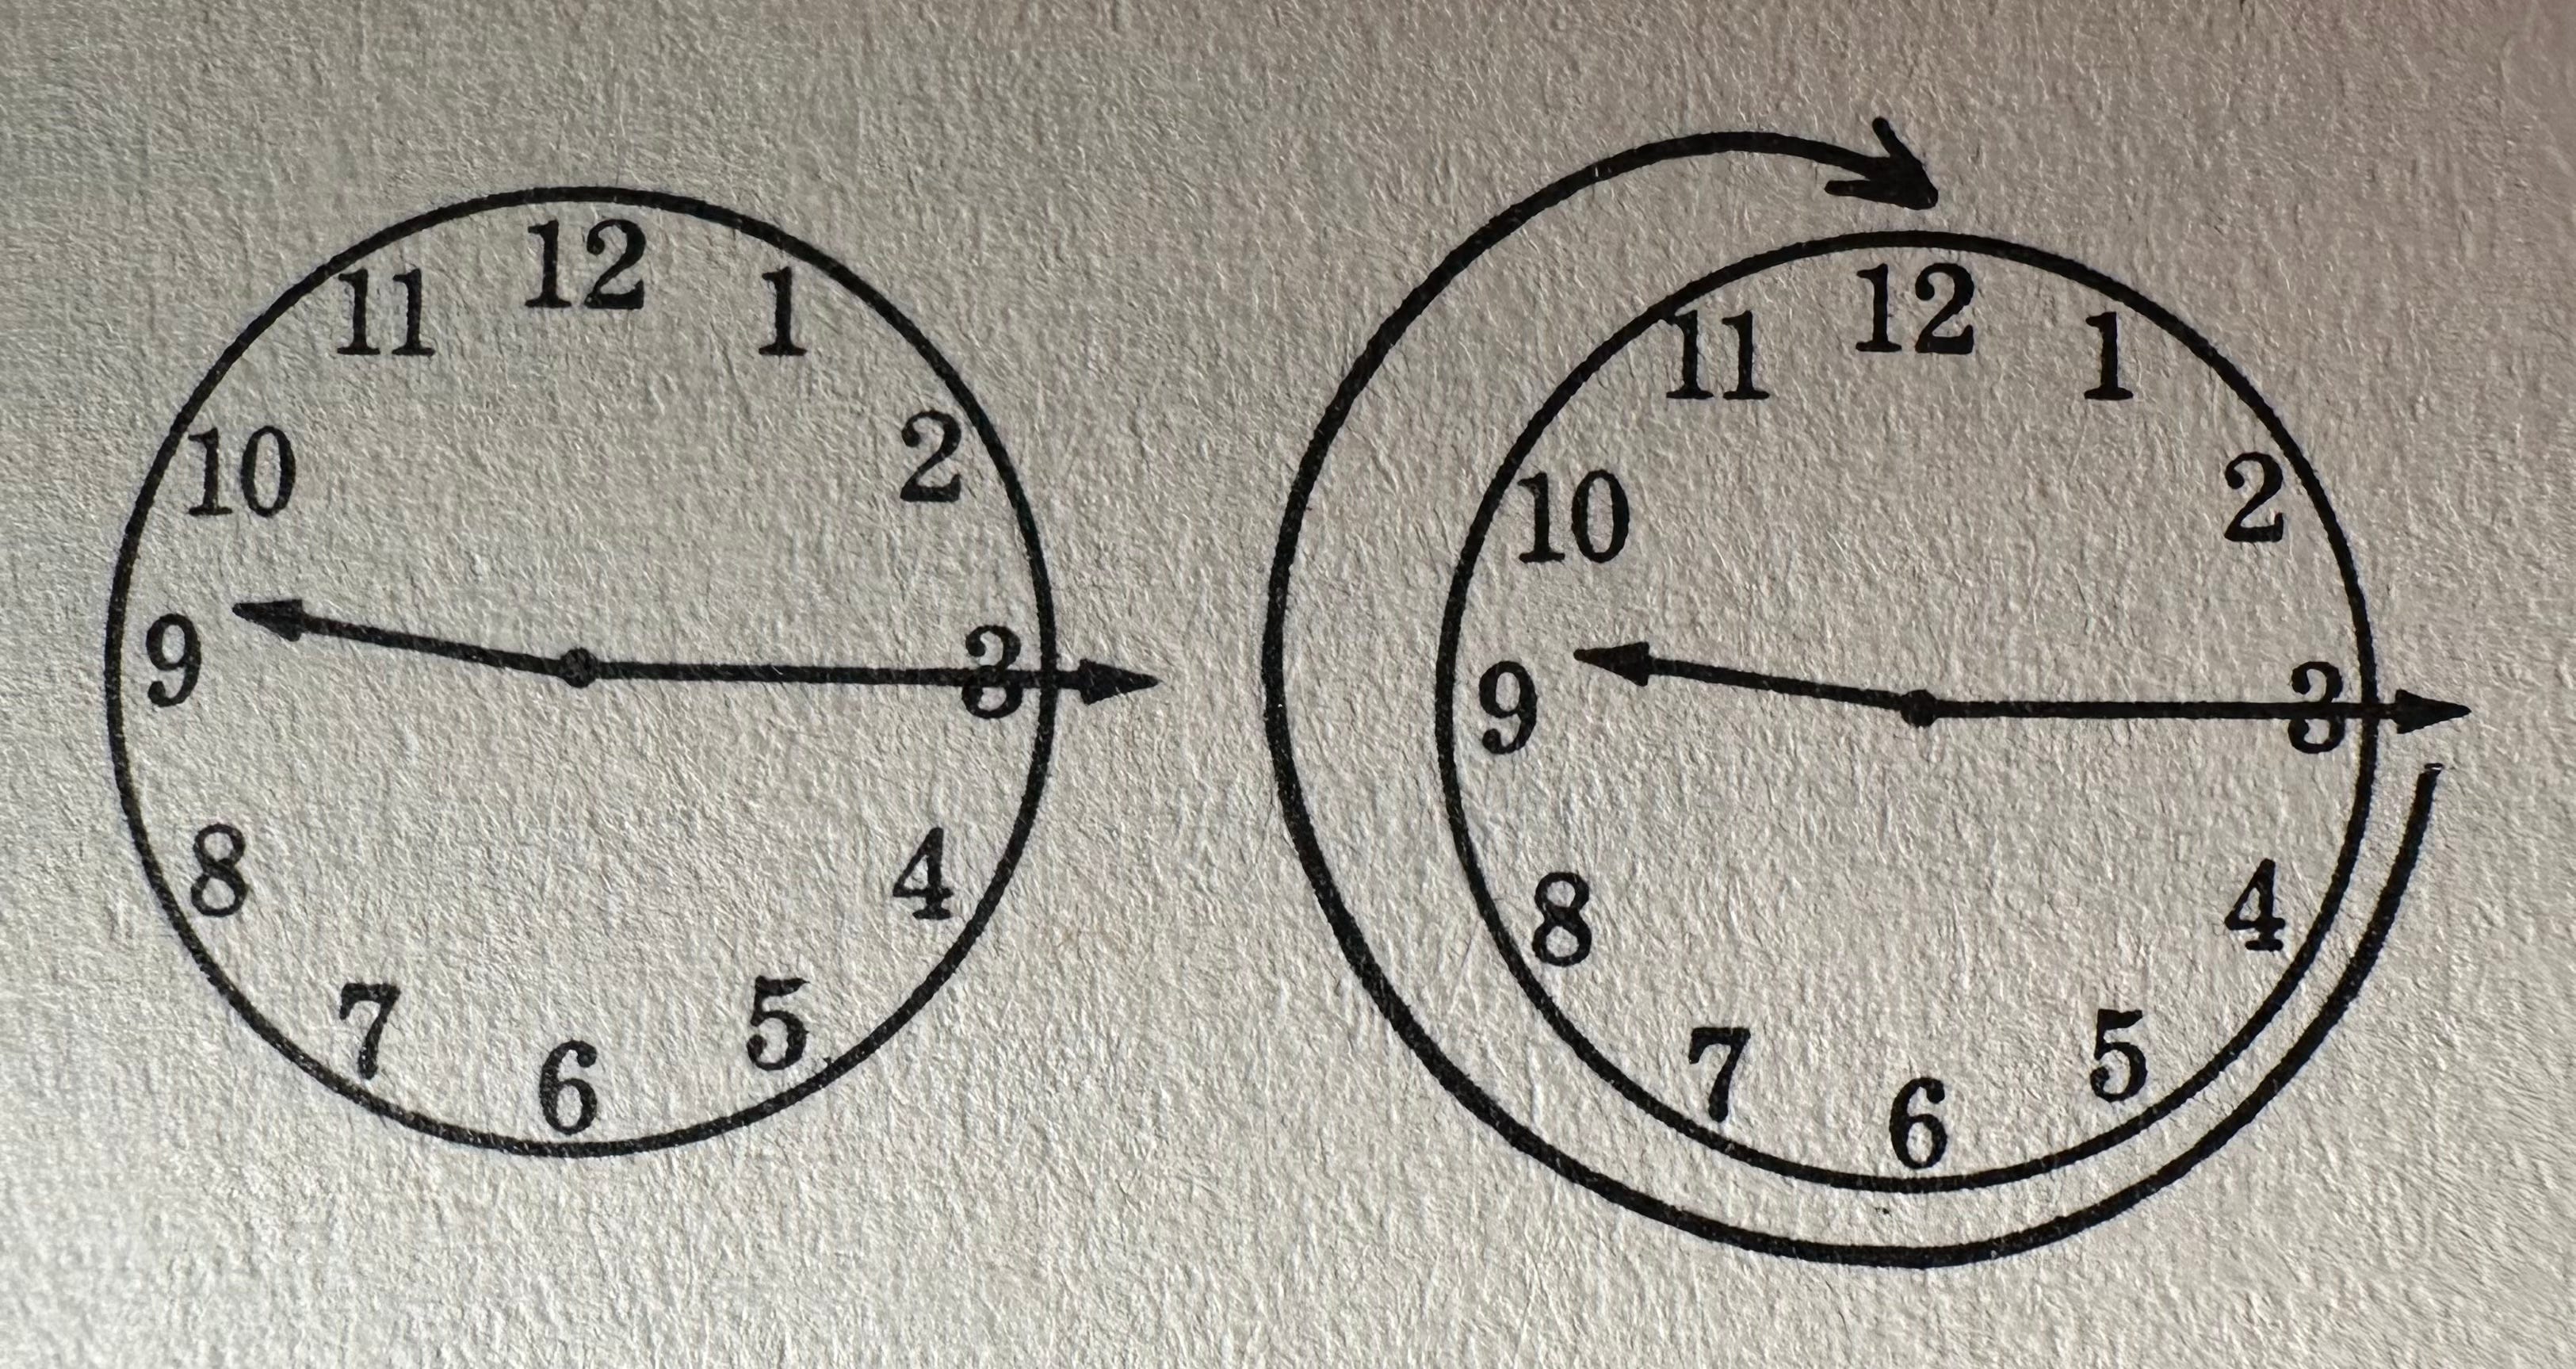
Step 3. Movement. Say, “A clock always moves in this direction”. Show Mary the direction the hands move. A clock moves toward bigger numbers so it has to move this way”.
Ask, “what is the next hour? And the hour after that? Show me which way the hands move. Show Mary a real clock with a second hand so she can see how the hands move.
Step 4. The long hand vs the minute hand. Say, “The long hand is the minute hand. The hour hand points to the numbers in the clock. The minute hand does not. It points outside the clock and you have to figure out the minutes.” Draw a clock with the minutes noted outside the clock. Then point to the minutes outside the clock. Draw a clock like this one below or you can use a “Teacher’s Choice” cardboard teaching clock where the numbers are printed outside the face of the clock.
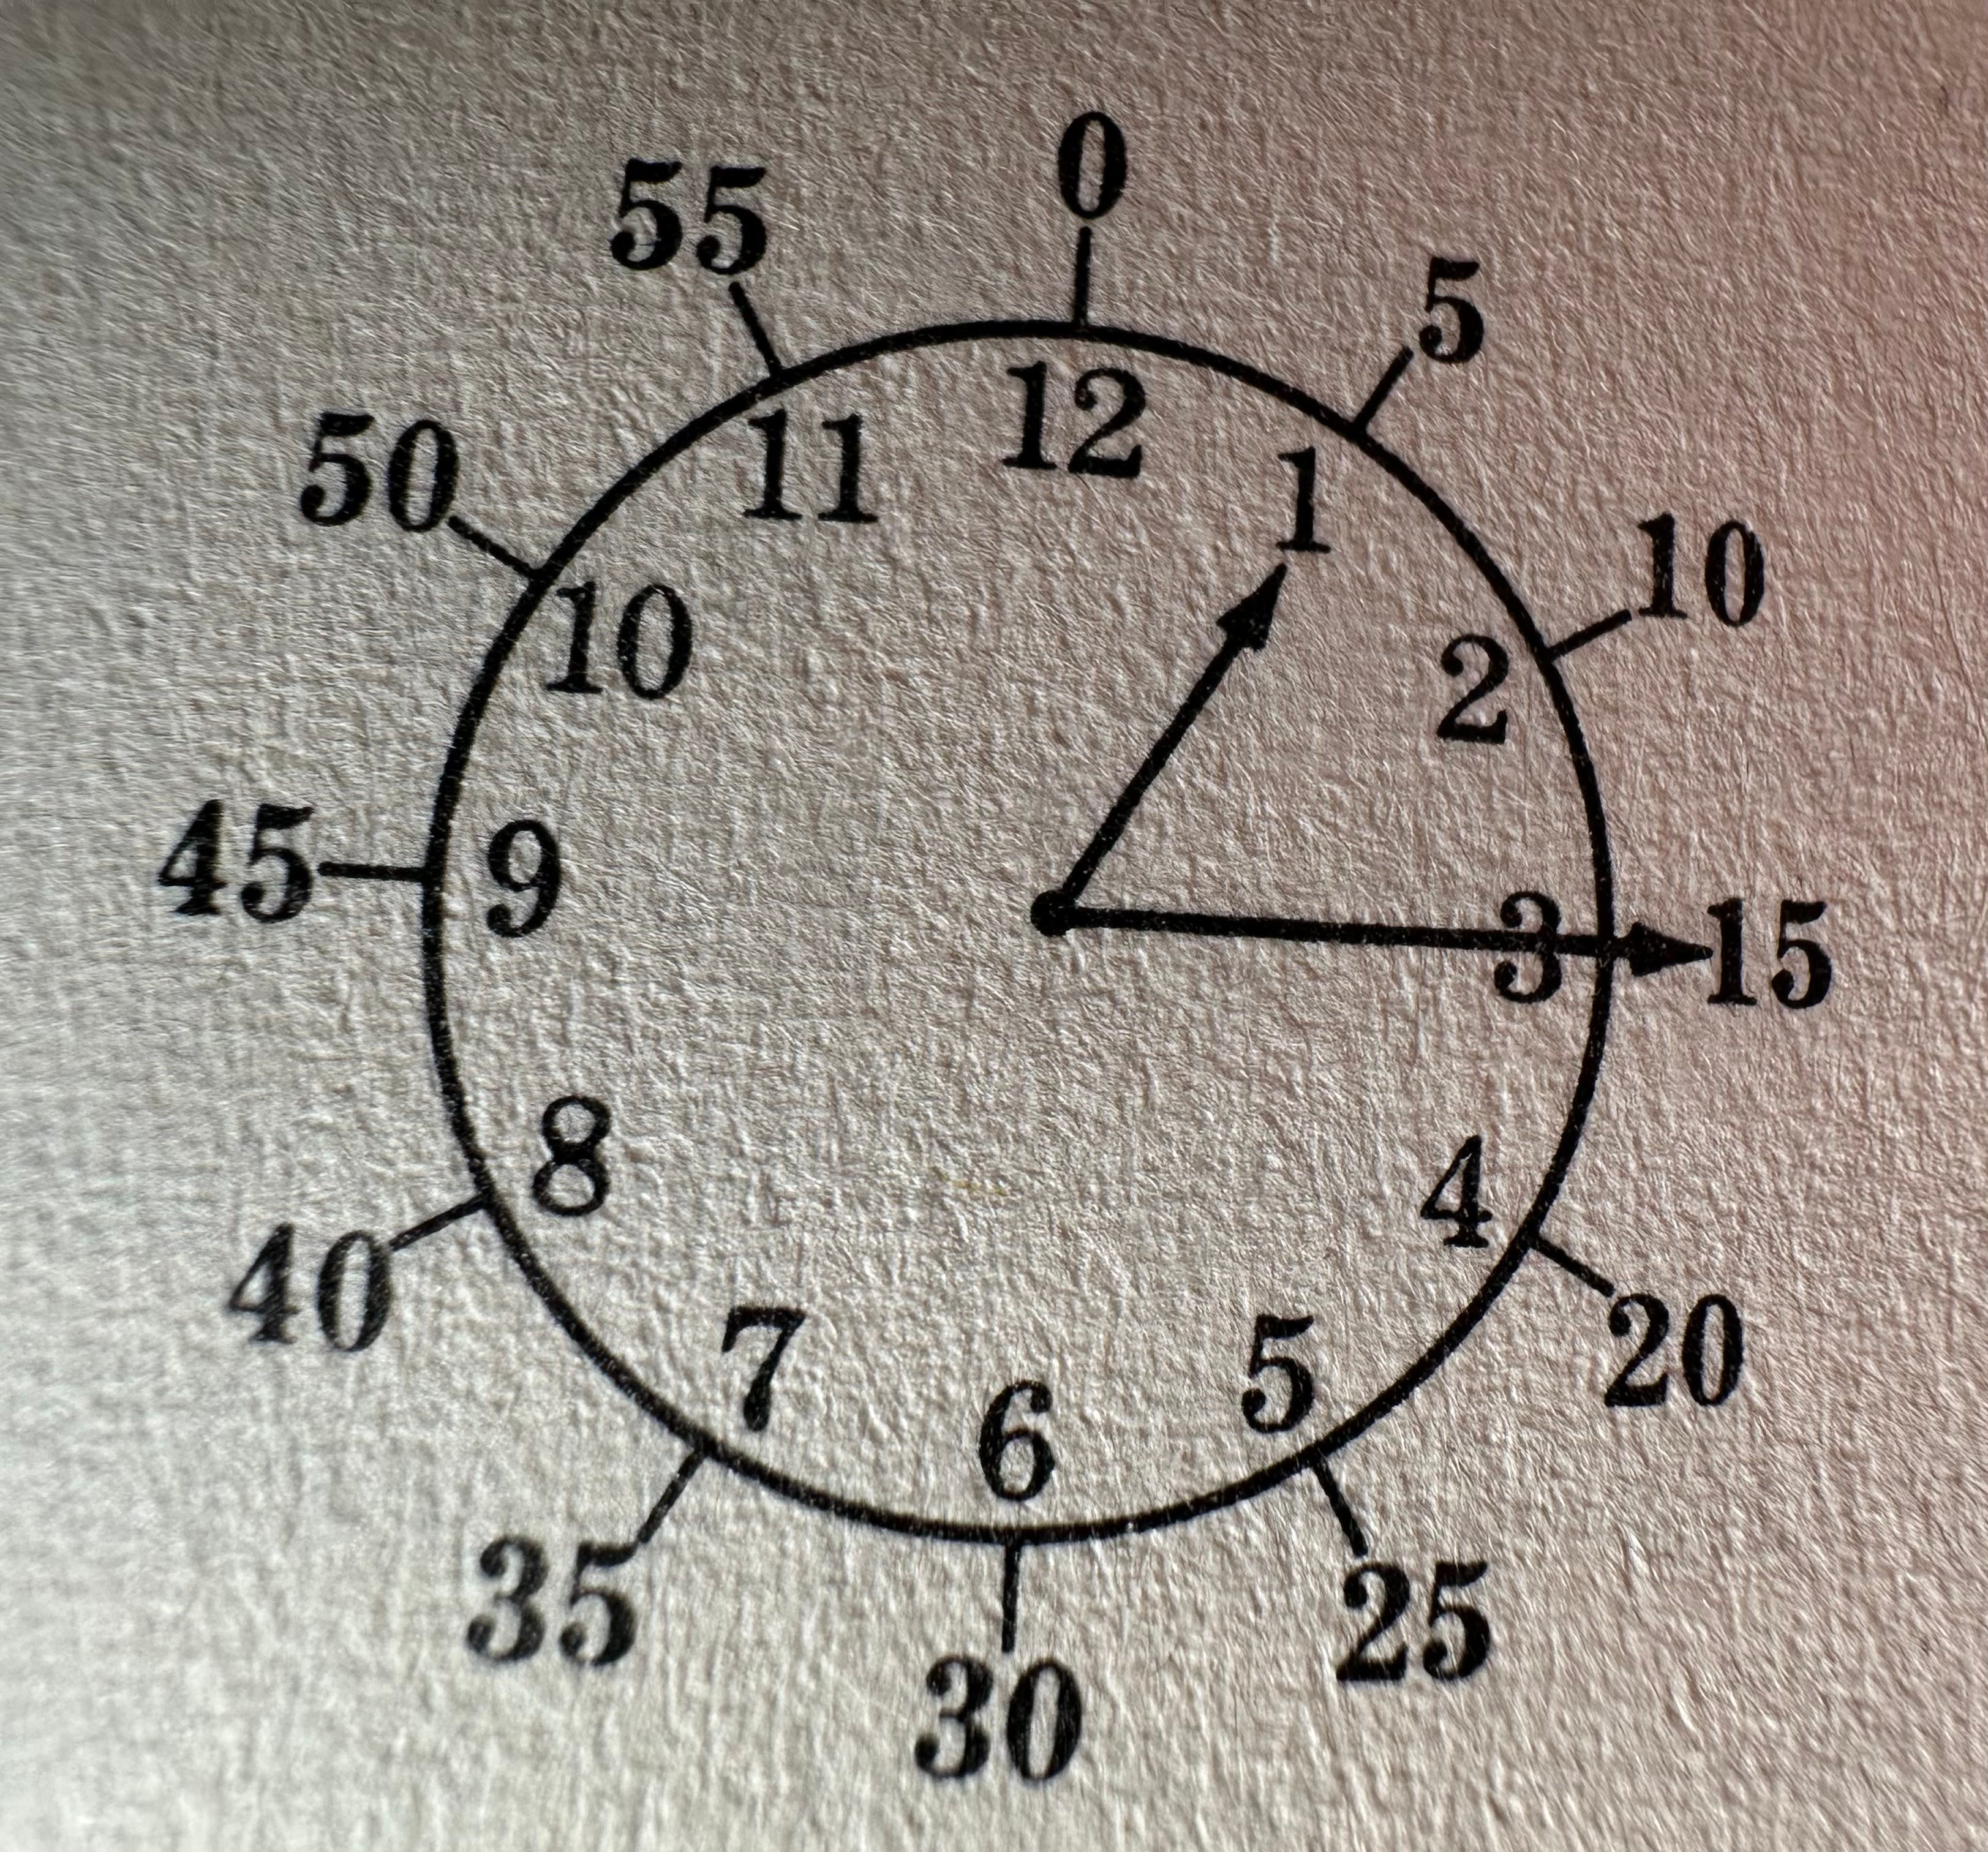
Say, “See the minute hand points to these numbers here (point to them). Zero is at the top, and then comes 5, then 10…15..20…25… . We count by 5s”. Point the minute hand to 10 minutes. “What number is the minute hand pointing to now? Yes, 10 minutes after.” “What number is the minute hand pointing to now? Yes, 15 minutes after.” “How about now? Yes, 20 minutes, Yes, 25 minutes”. Present problems on a clock that has only a minute hand.
Englemann says to introduce examples in which the hand points directly at the numbers outside of the face. No 6 minute or 13 minute hand. Don’t read off the answer. Start at 0 and count by fives until you reach the minute hand. Then express the answer in terms of minutes after. Say, “It’s 10 minutes after an hour, it’s 20 minutes after the hour” and so on.
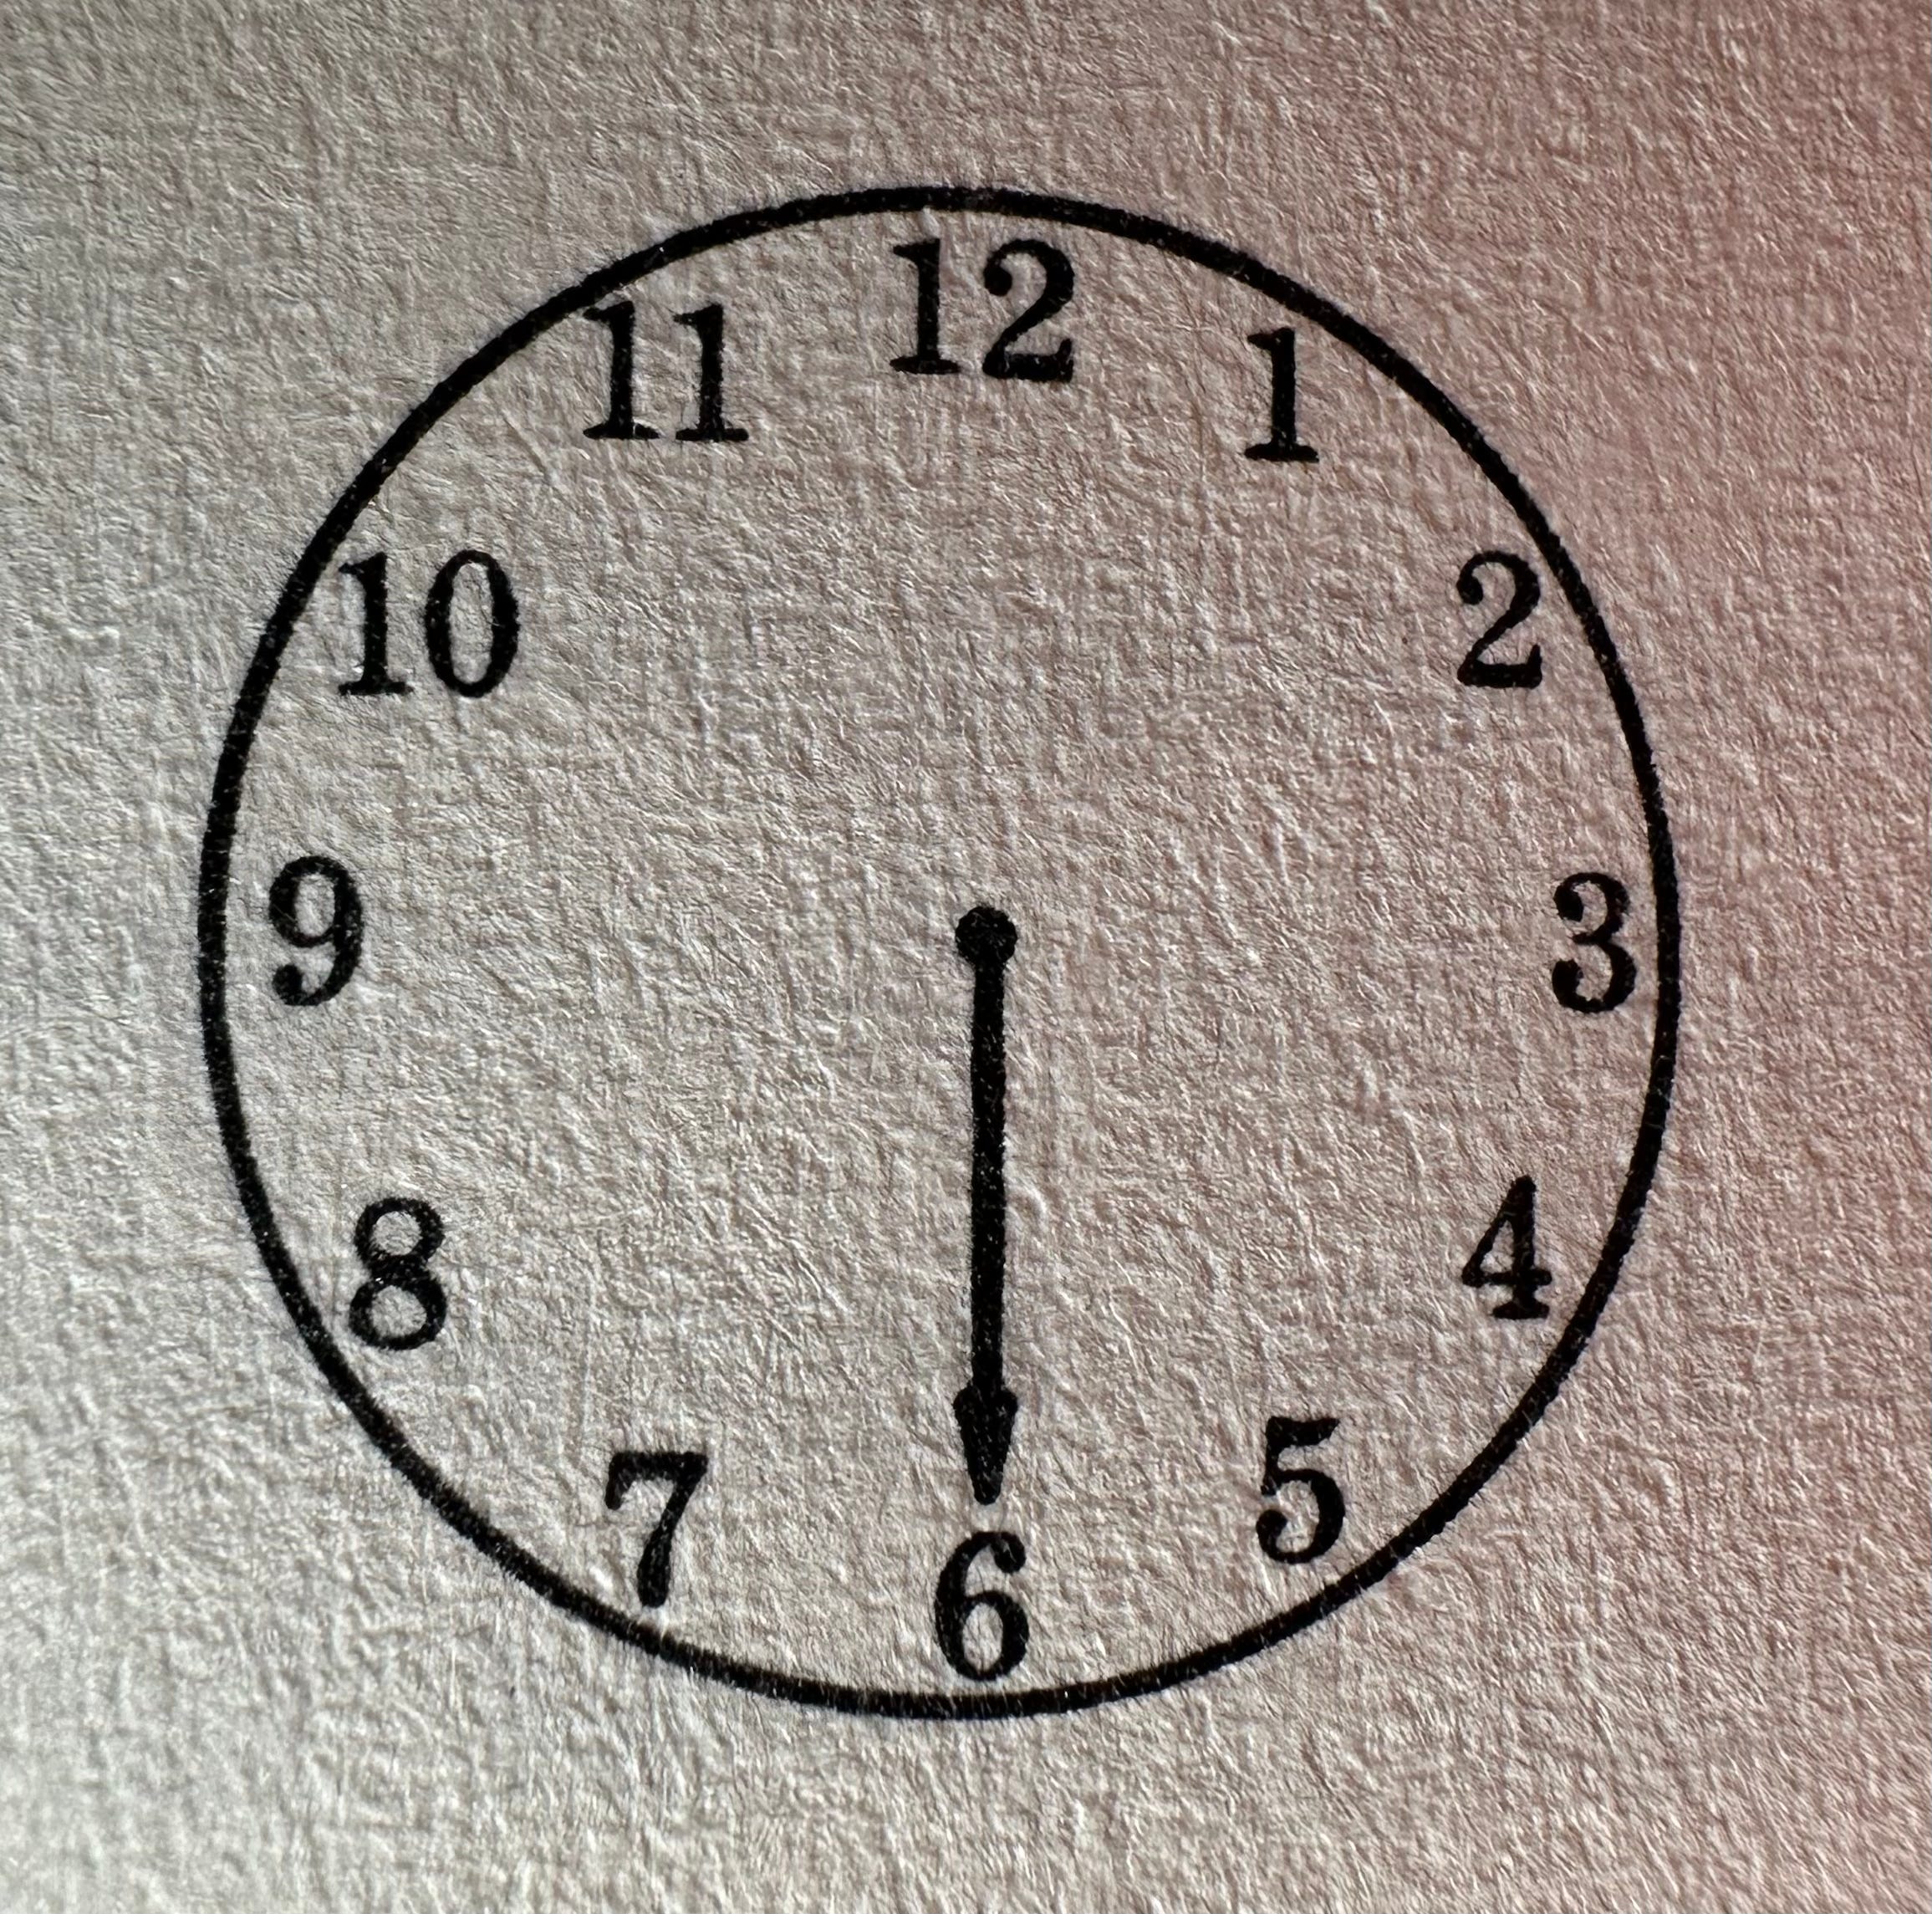
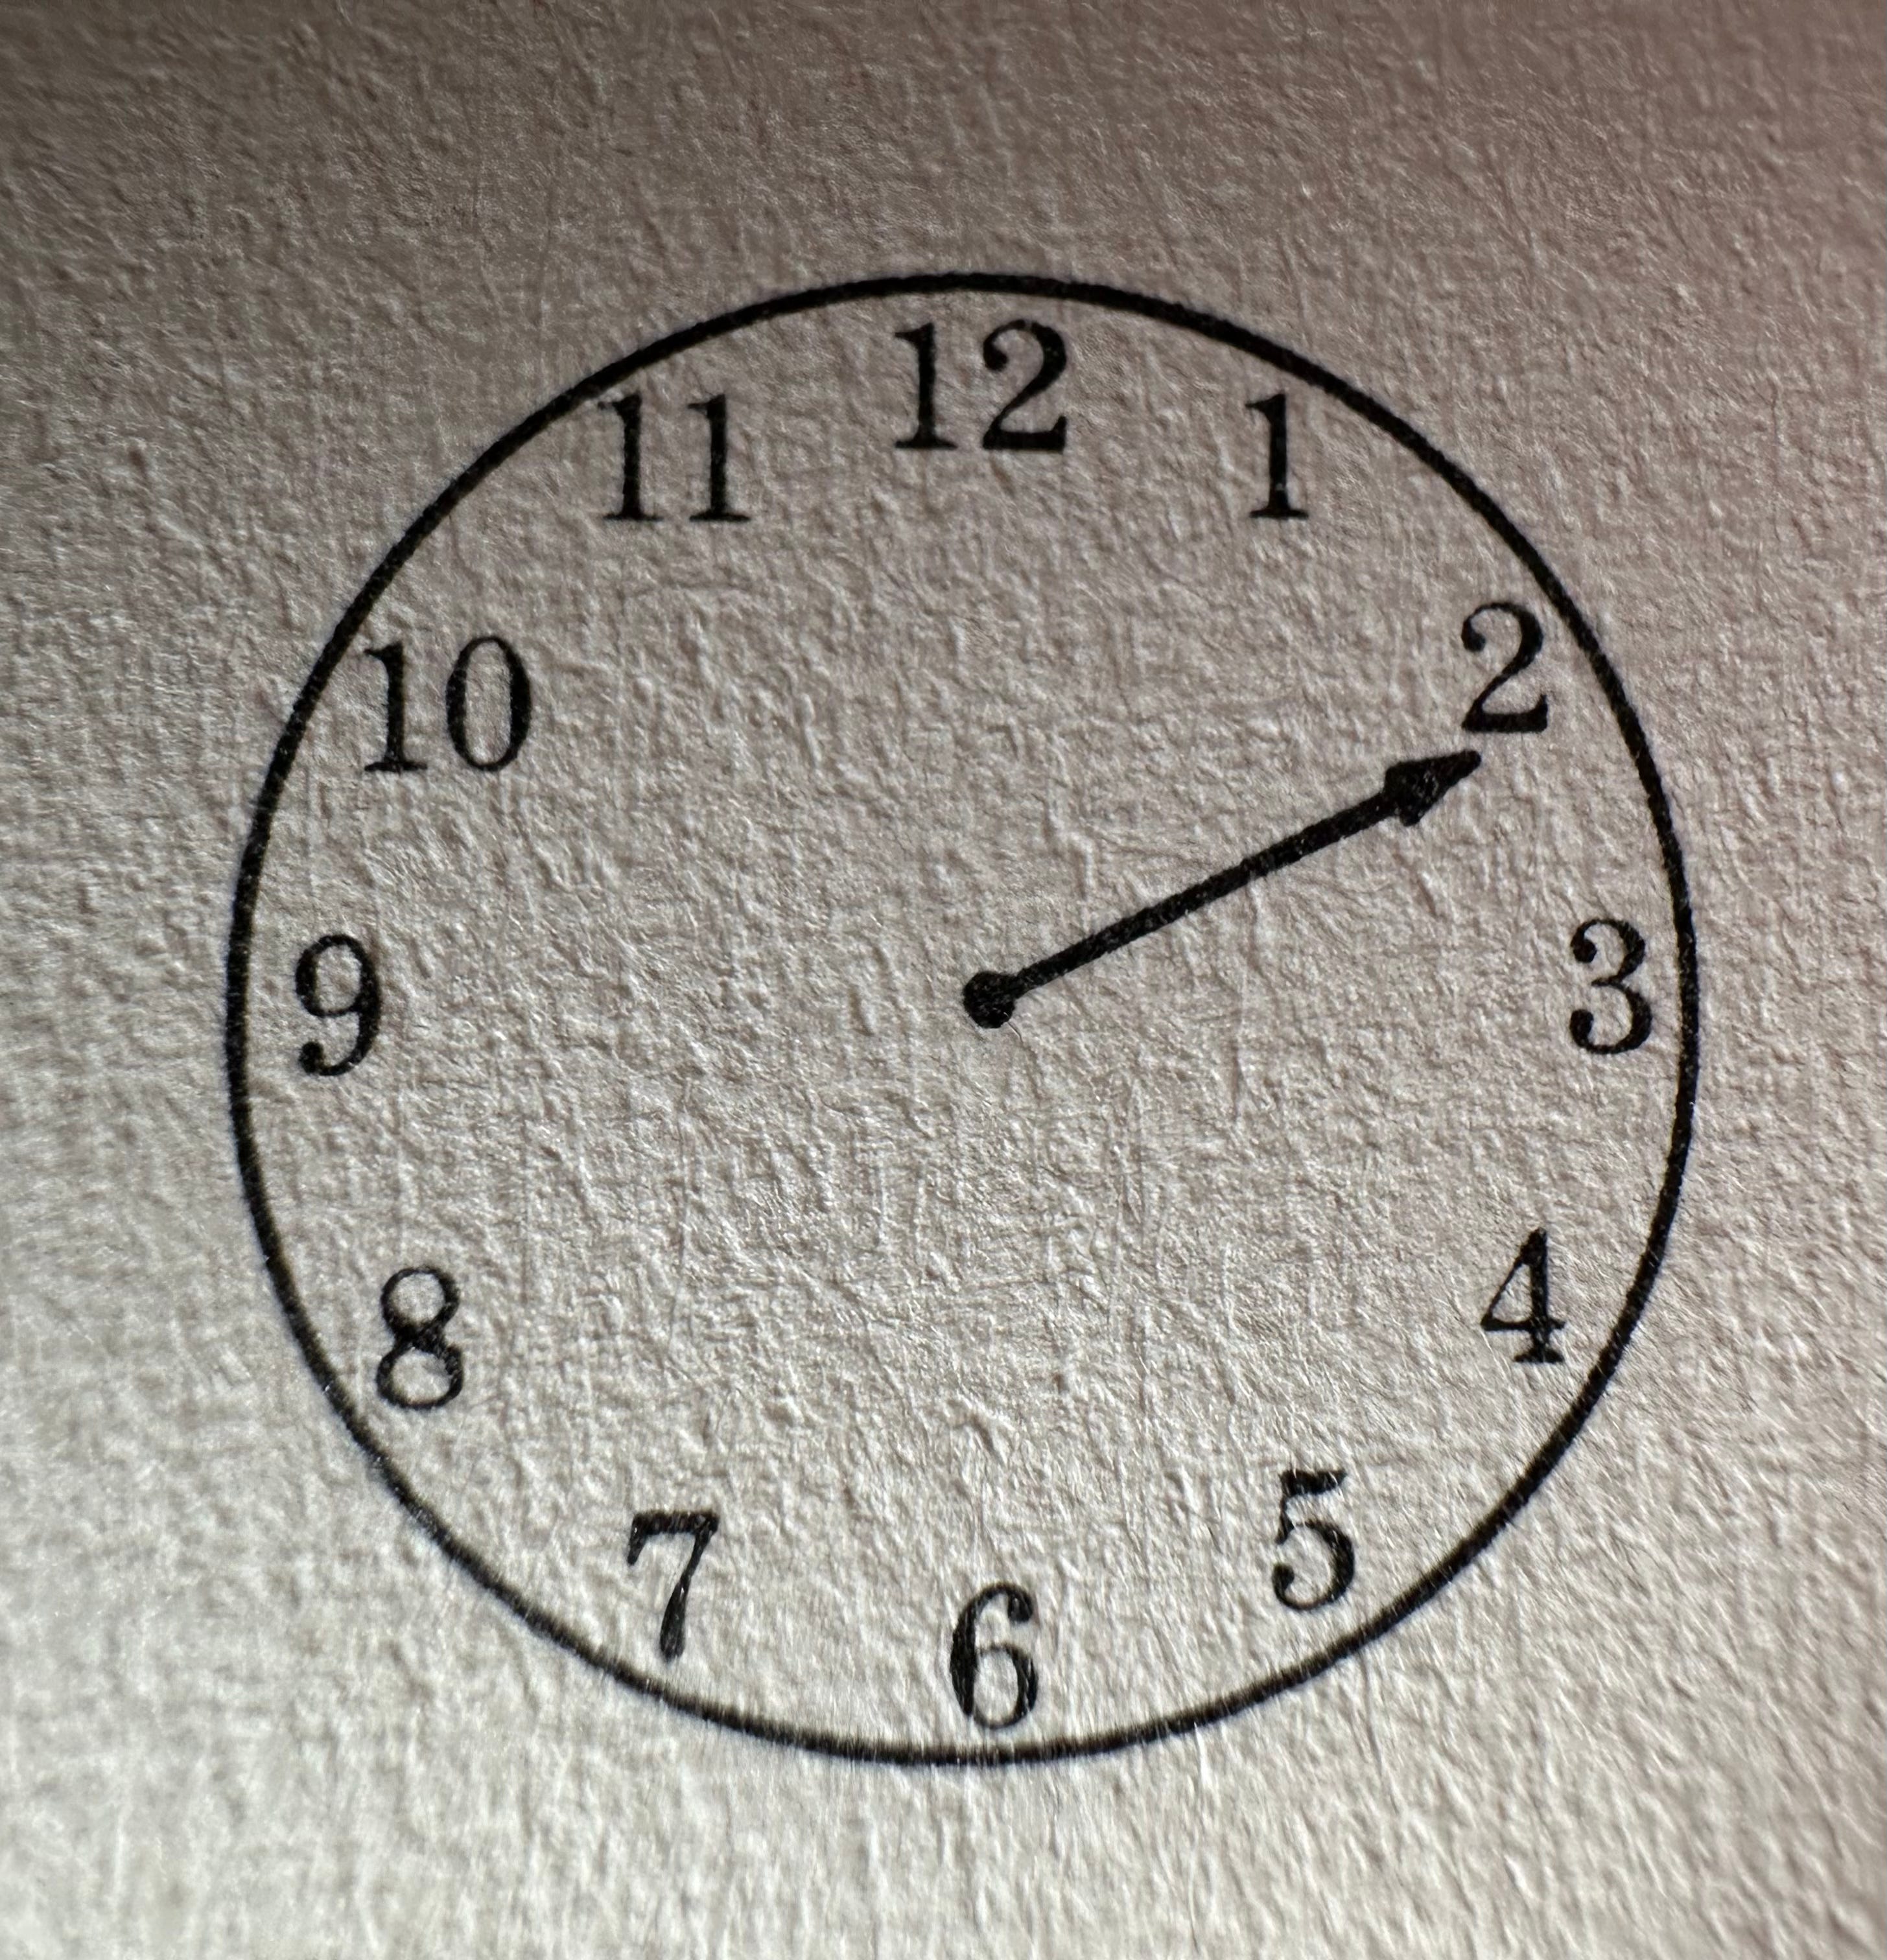
Step 5. O’clock problems. Place the minute hand at 0.
Begin the strategy to tell time. Engelmann suggests, “First figure out how many minutes are after the hour. Then look at the hour hand to see what you’re after. It’s 0 minutes after 4. And when it’s 0 minutes after 4, we say it is 4 o’clock. Do we say it’s 4 o’clock when it’s 5 minutes after 4 or 15 minutes after 4? No. Just when it’s 0 minutes after 4. Give the child many opportunities to practice.
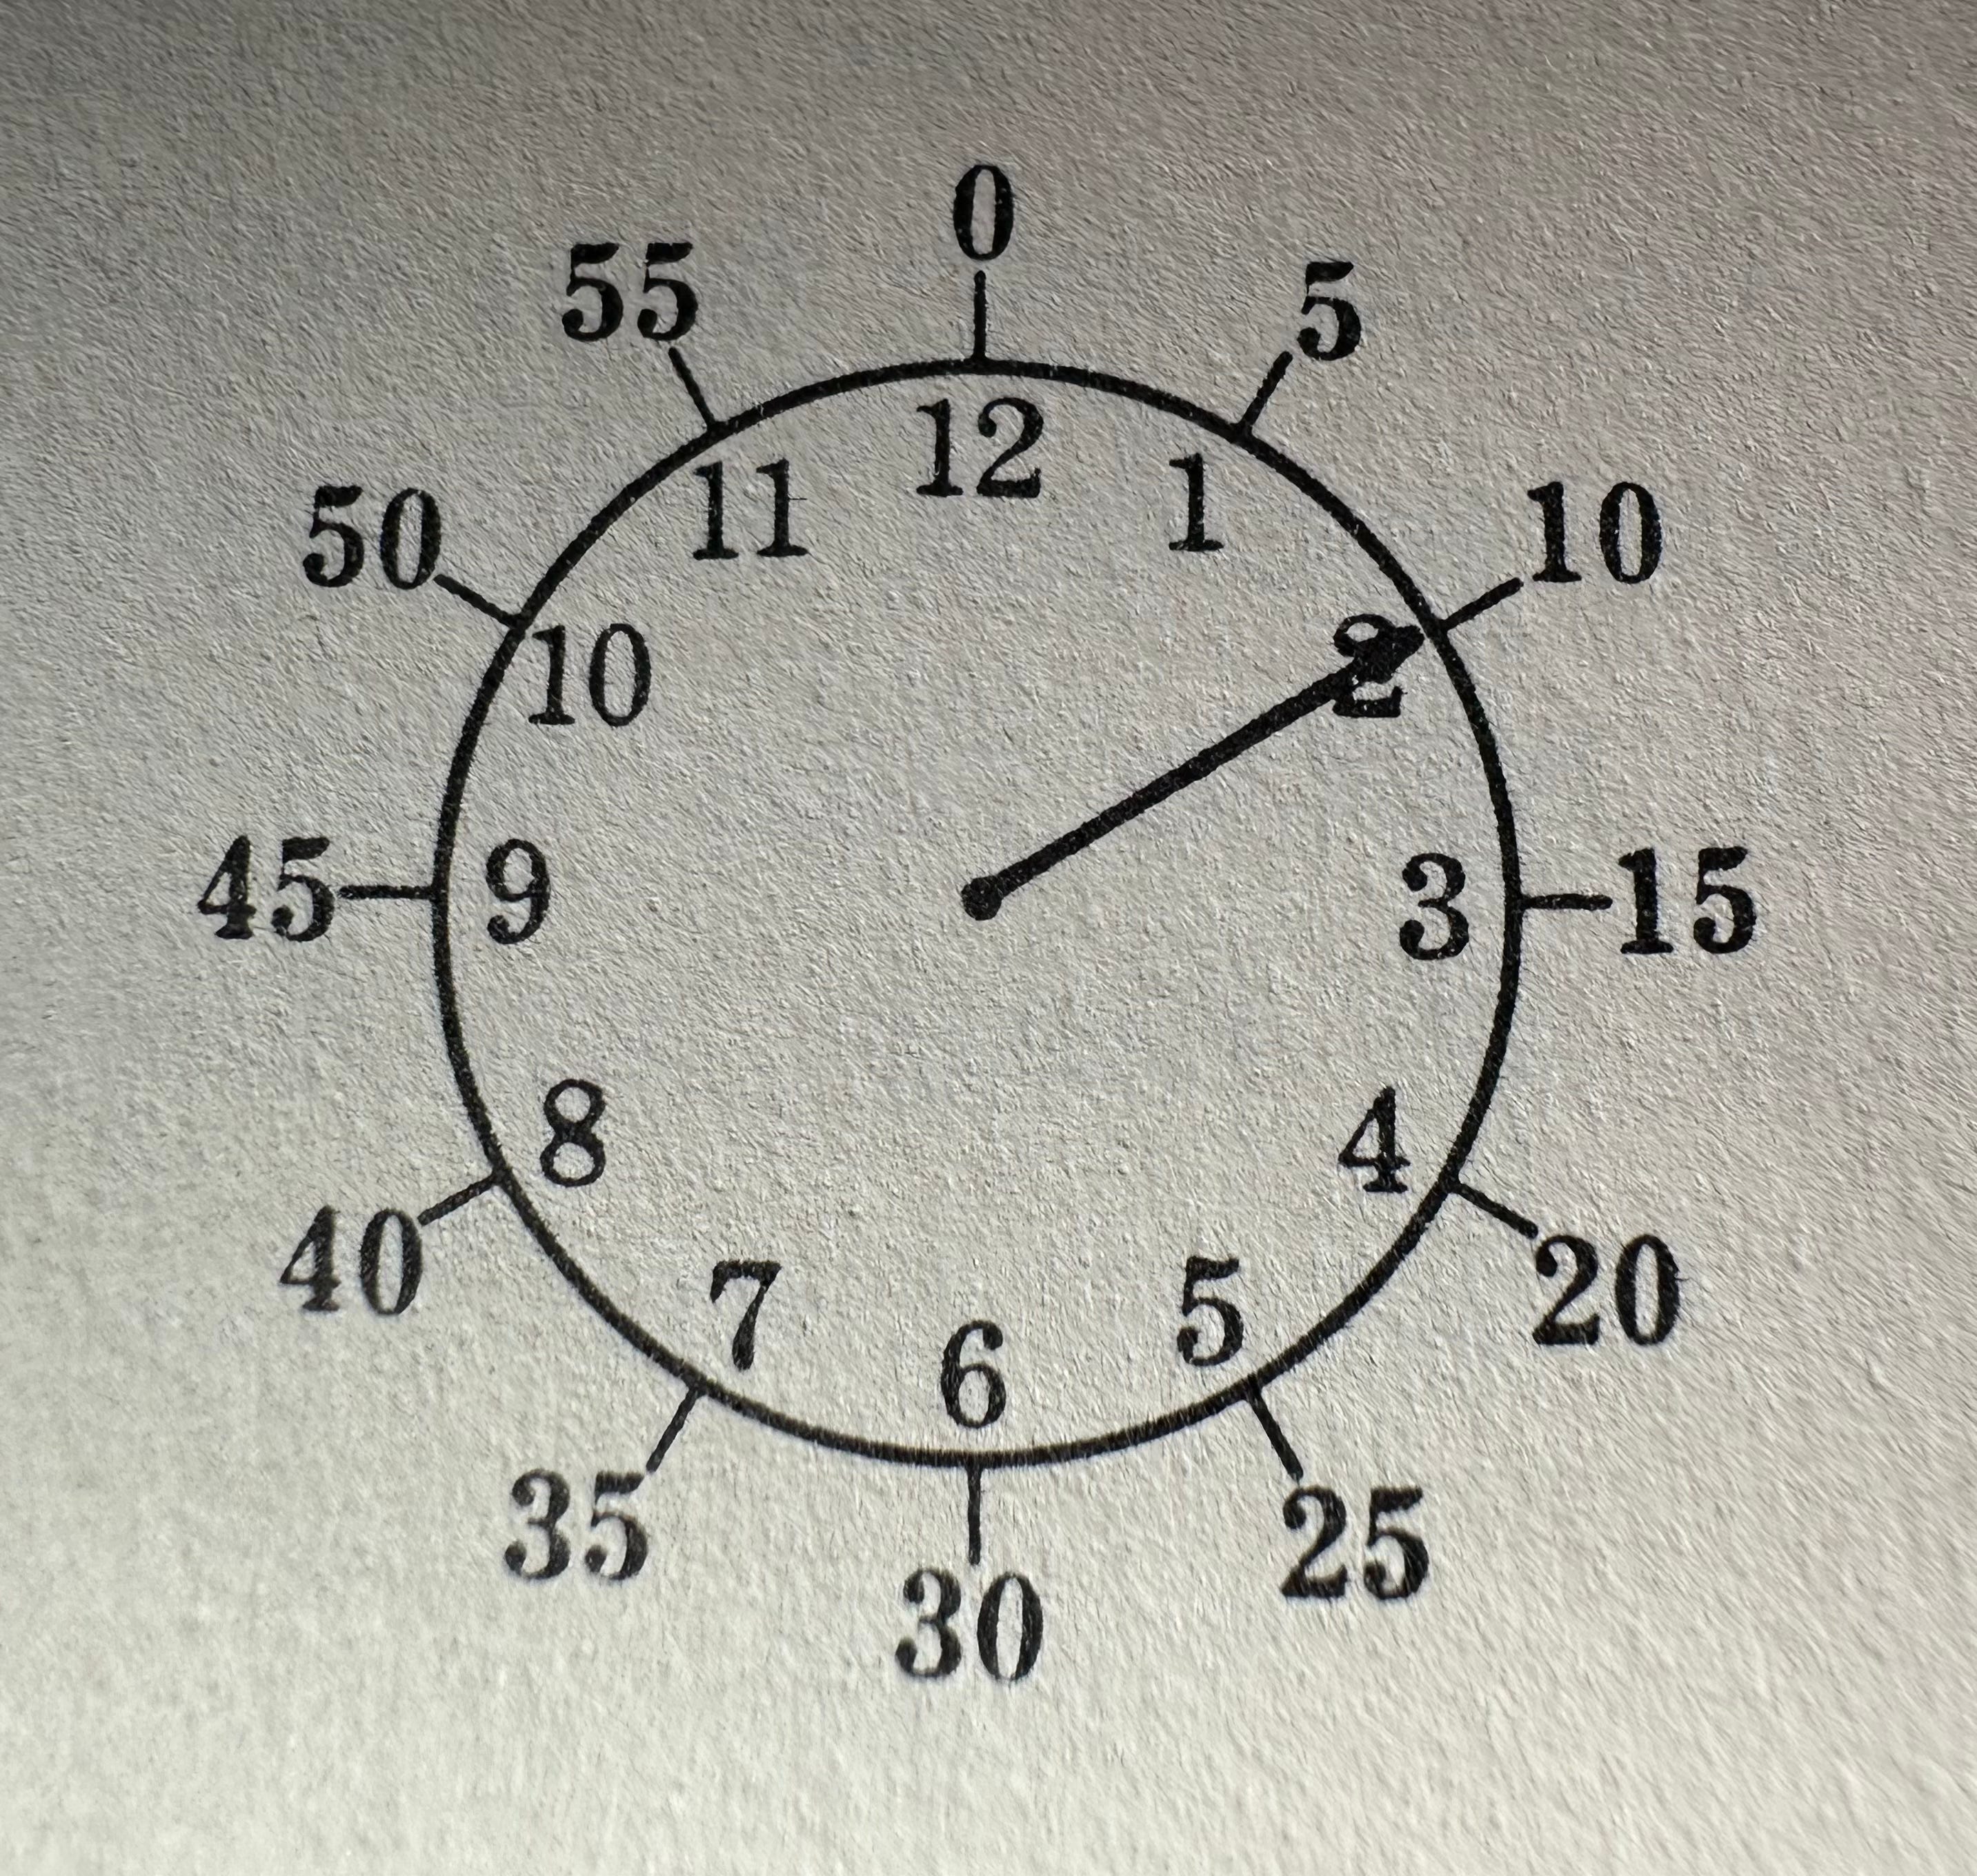
Step 6. Minutes-after problems. Engelmann suggests, “Now give problems in which the minute hand is at 5,30,55, or another number other than 0.
“Use the same procedure introduced above. Say, “First figure out how many minutes after the hour. Start at 0 and count by 5s until you come to the minute hand….20. So, say 20 minutes after… Now we figure out after what hour. Look at the hour hand. What’s it pointing to? 3. So it’s 20 minutes after 3. Say it”. Draw the hour hand so it is obviously pointing to the number the child will read, says Engelmann.
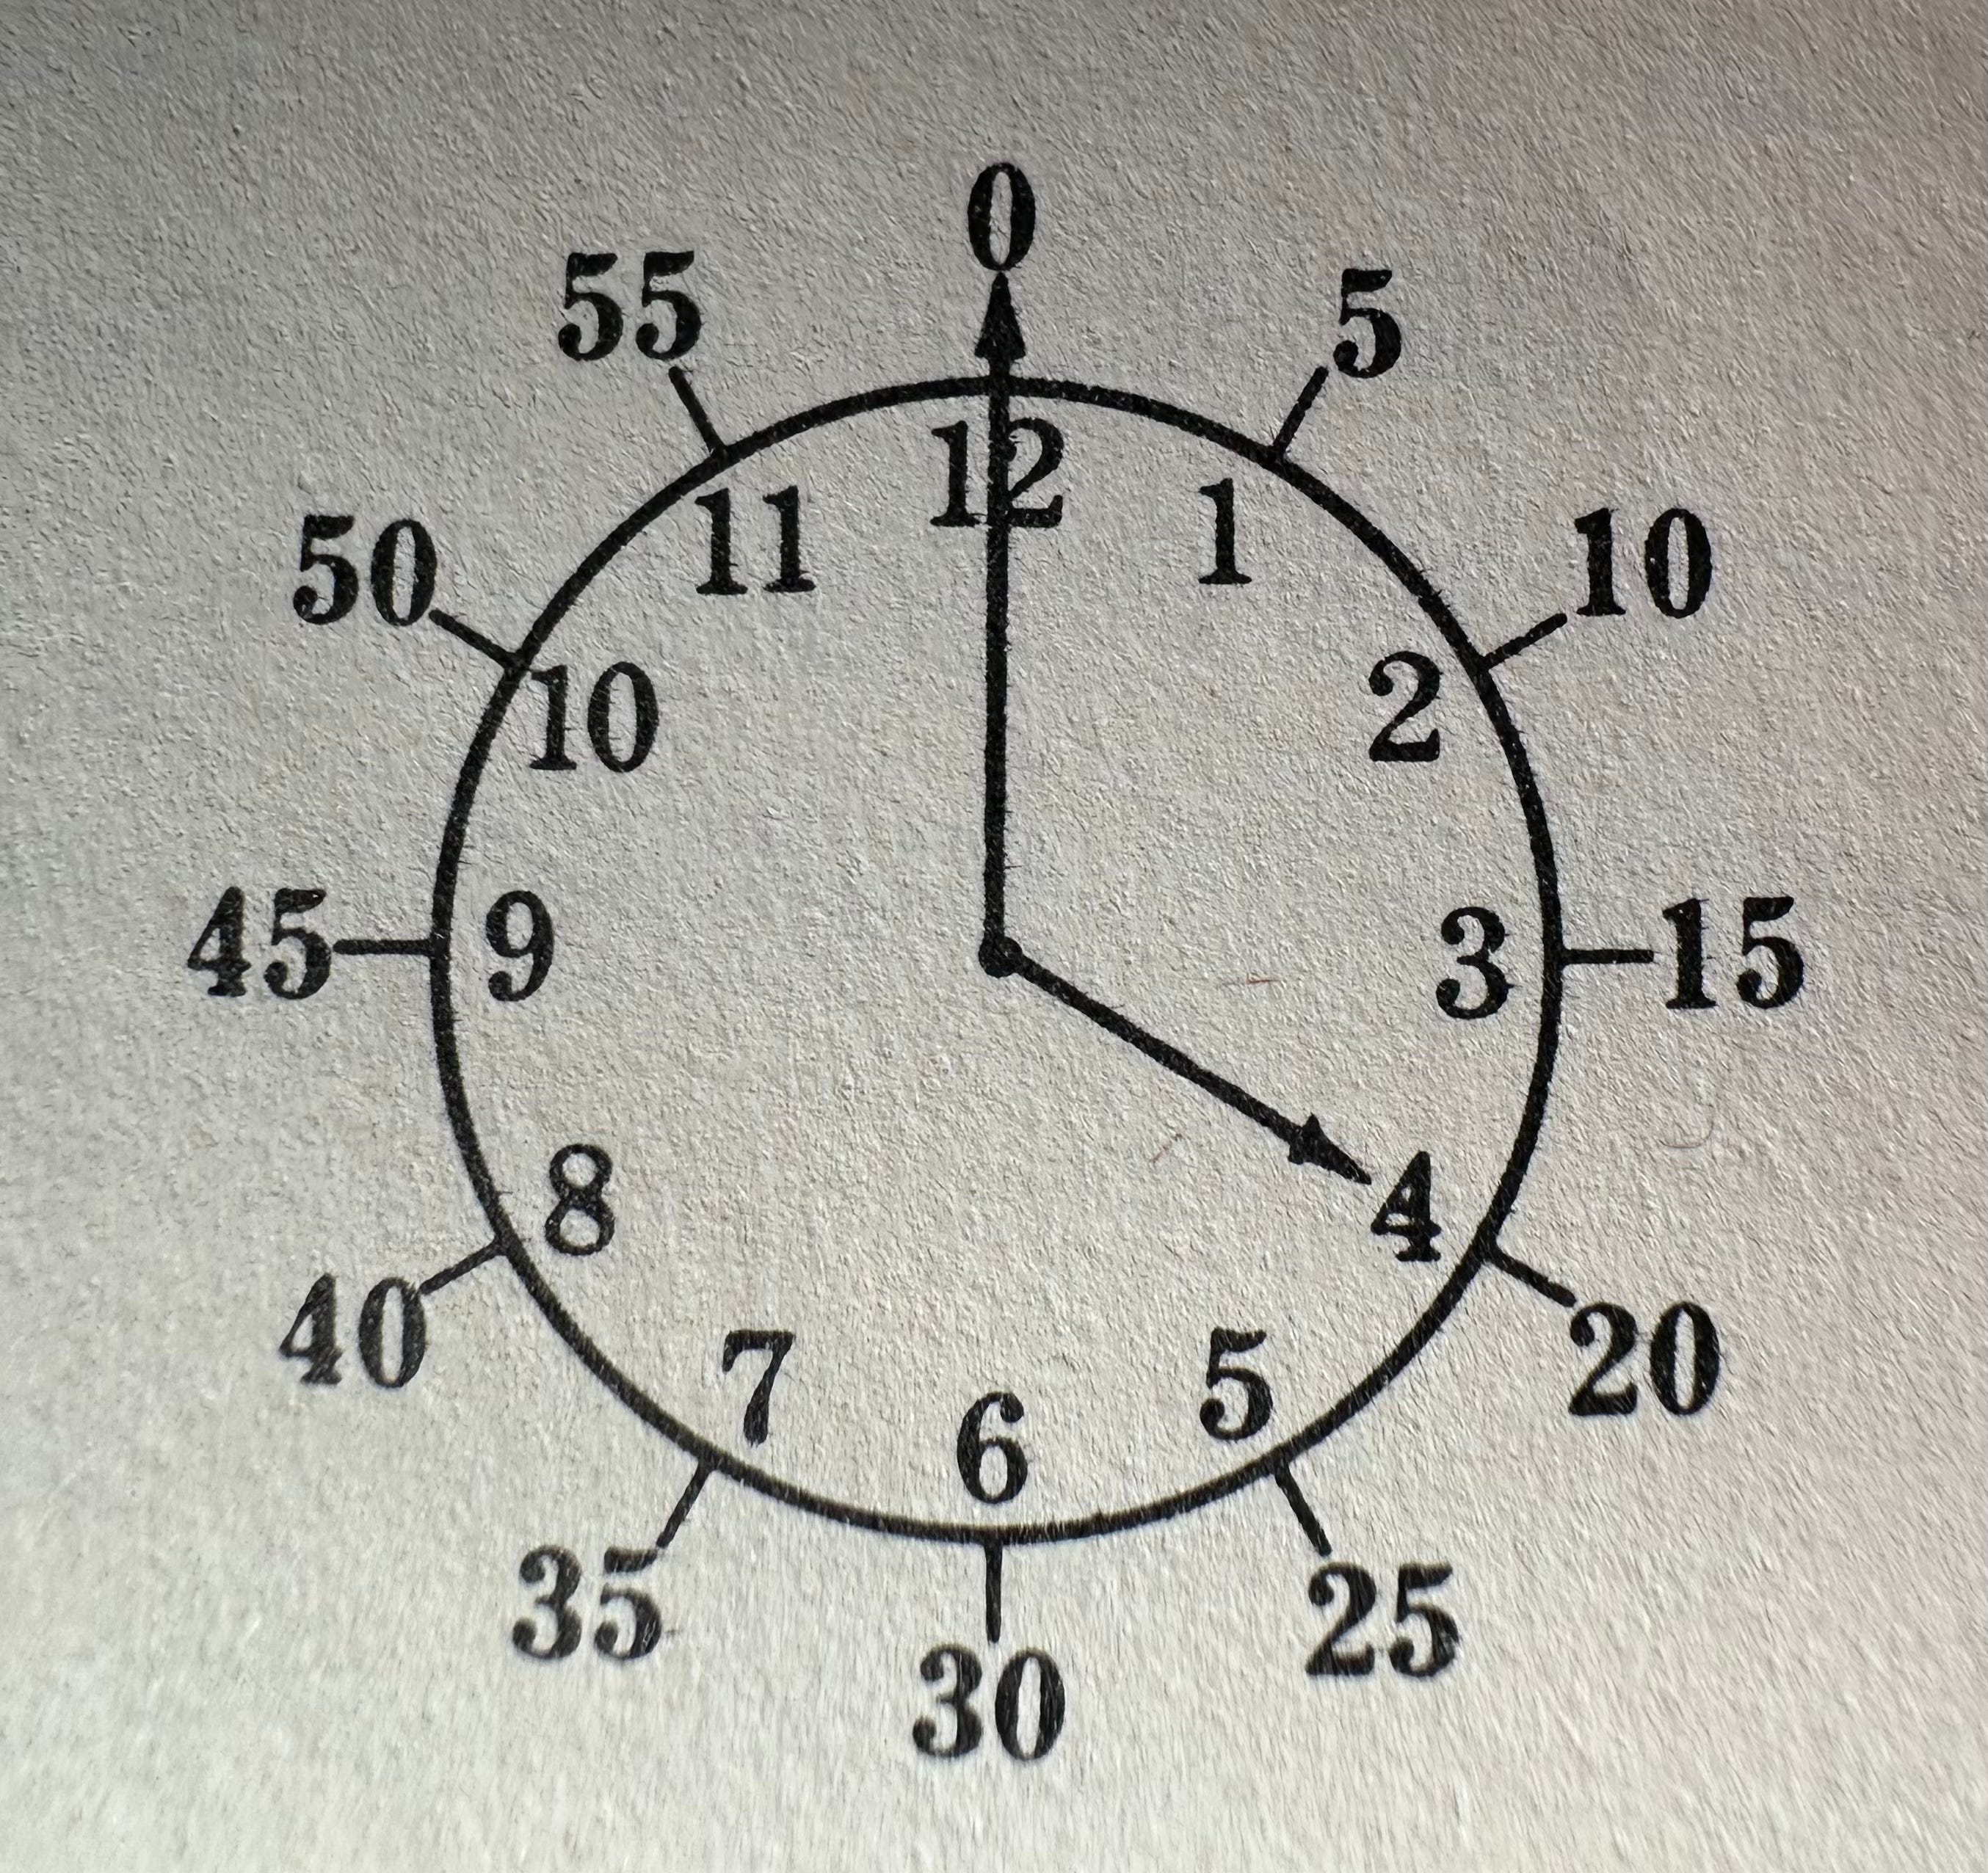
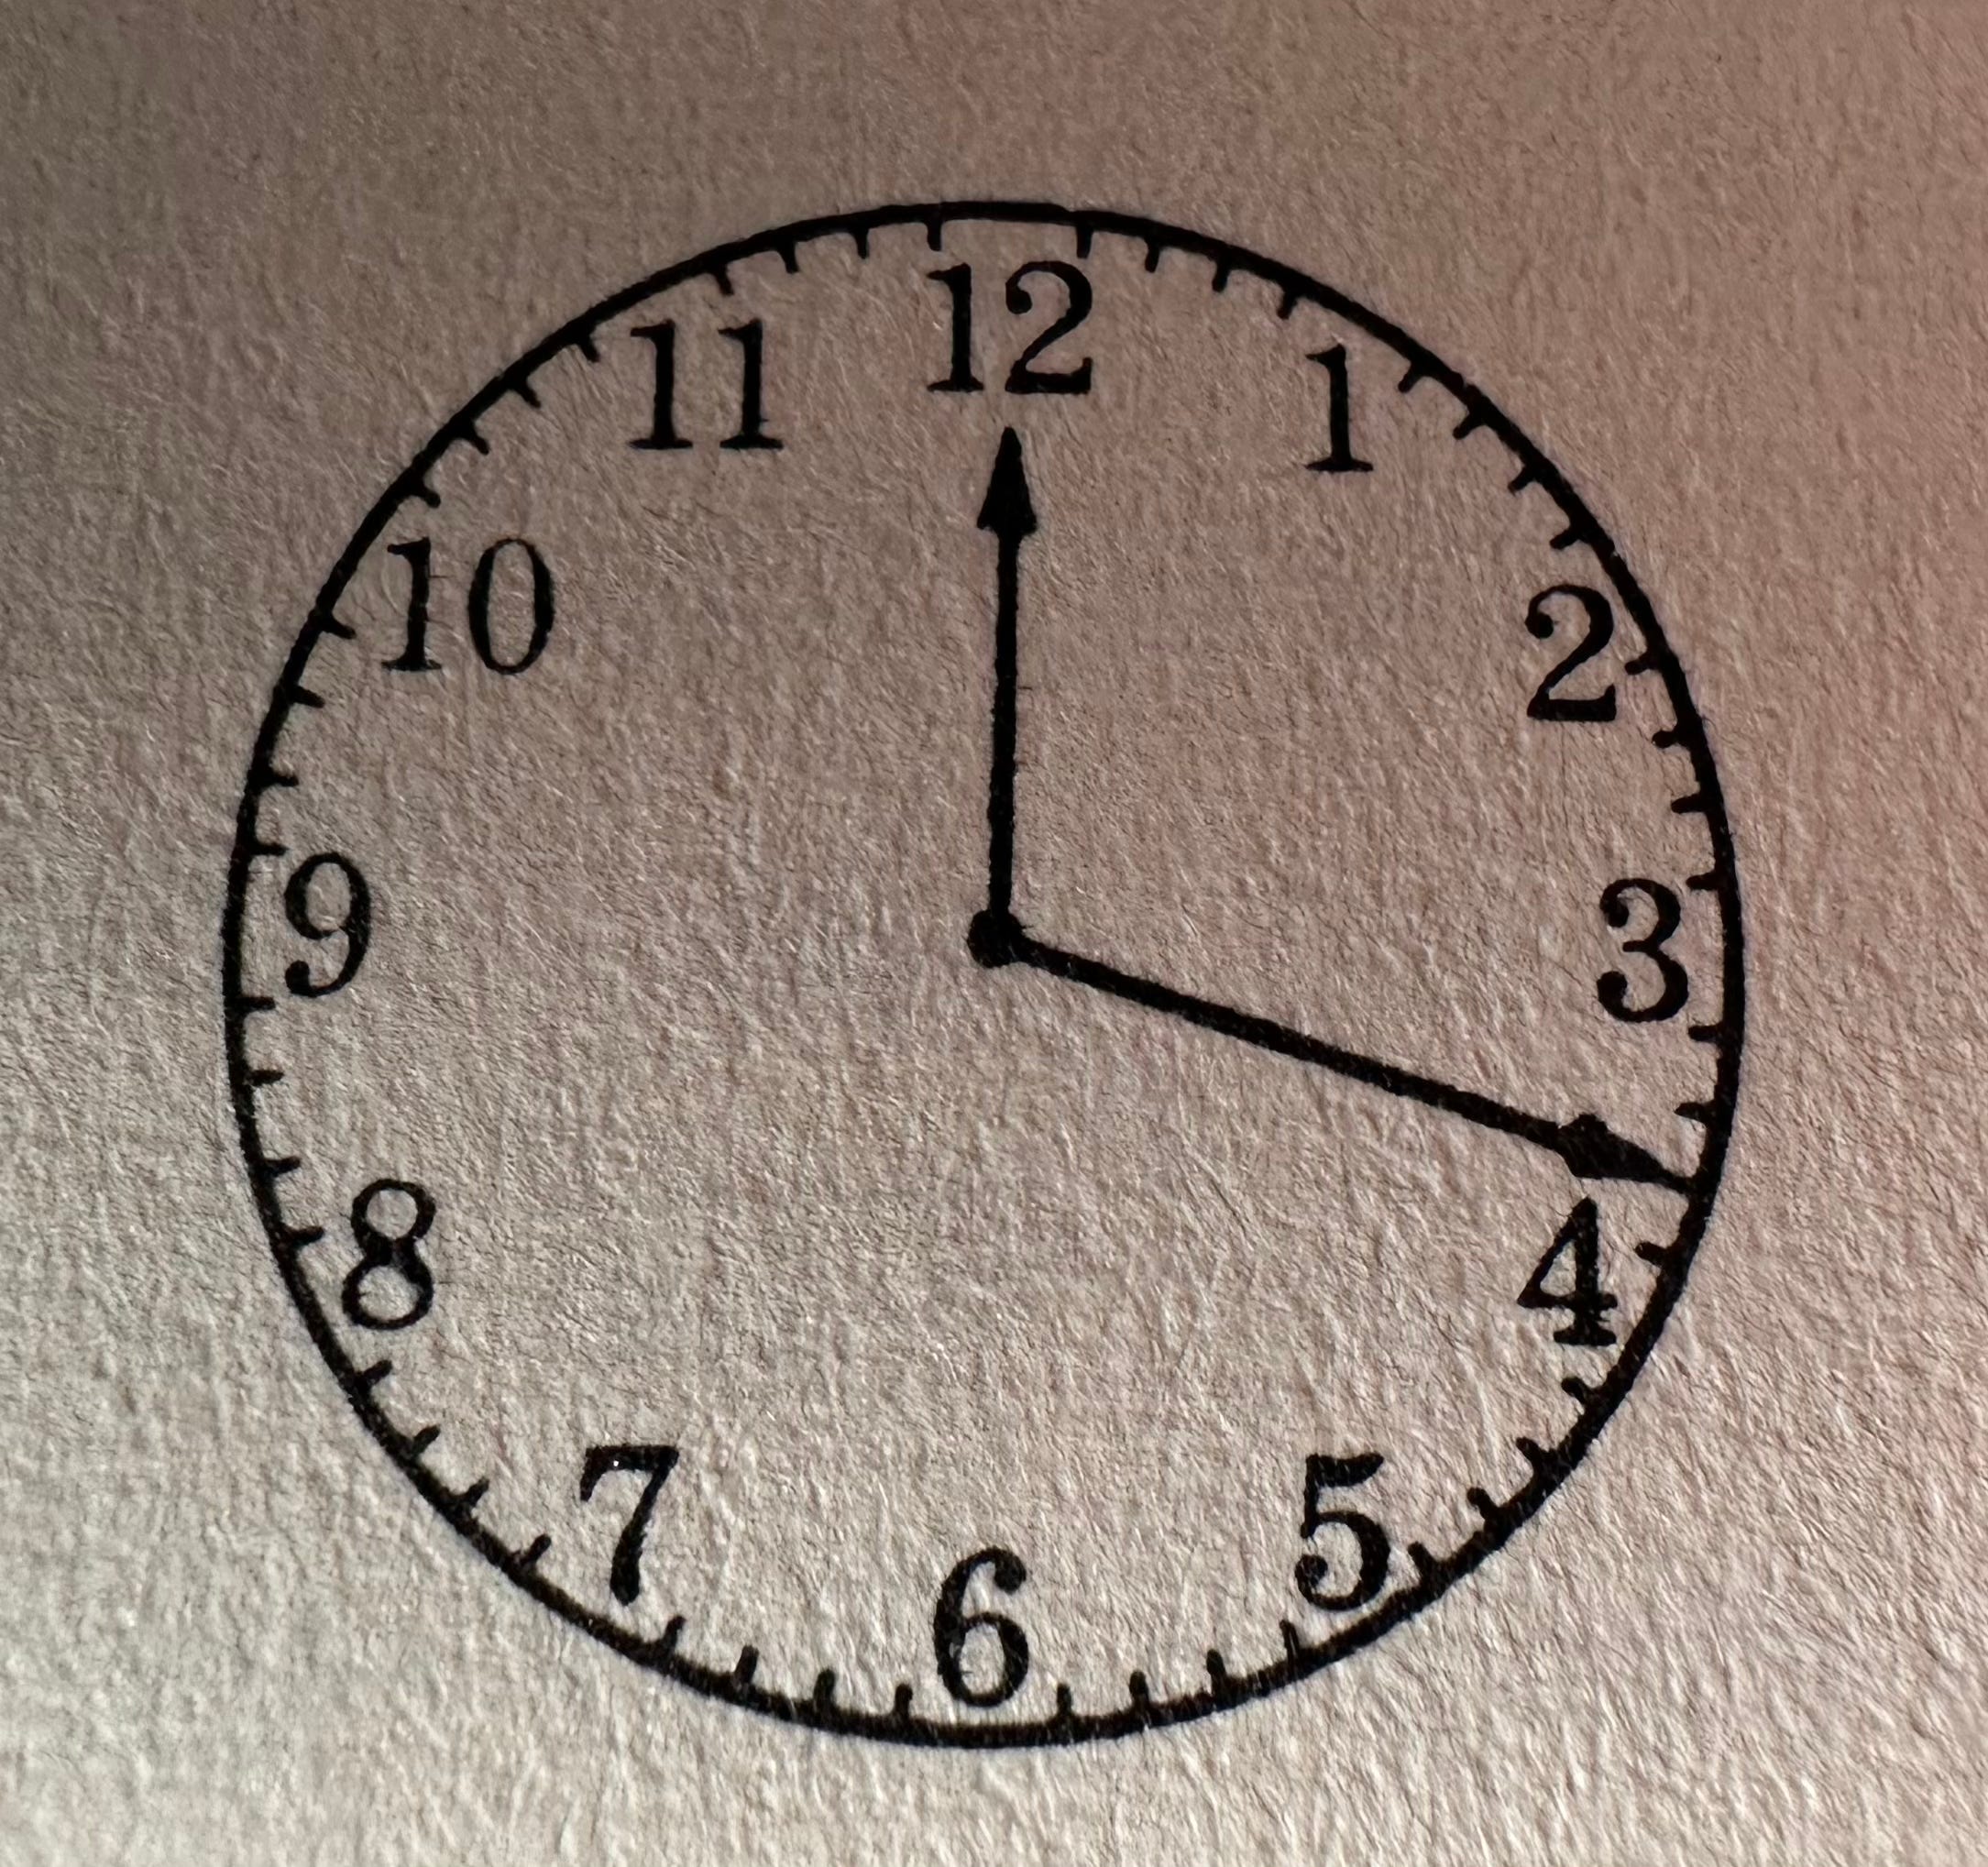
Step 7. “Draw a clock where the minute hand sticks out of the clock, but omit the numbers outside the face of the clock. Draw the hand so that it goes through one of the numbers on the face.
“Look there are no minutes on this clock, but we can still figure out the time, can’t we? Remember, the rule. Start at the top, at 0, and count by 5s until we reach the minute hand. 0…5…10…15…20 twenty minutes after. Look at the hour hand. After 1”. “Give the child plenty of practice with problems like this. Start with numbers 5,10,15,20,25,30. As the child becomes more fluent introduce problems up to 55 minutes after. When practicing always make the hour hand point to a number”, says Engelmann.
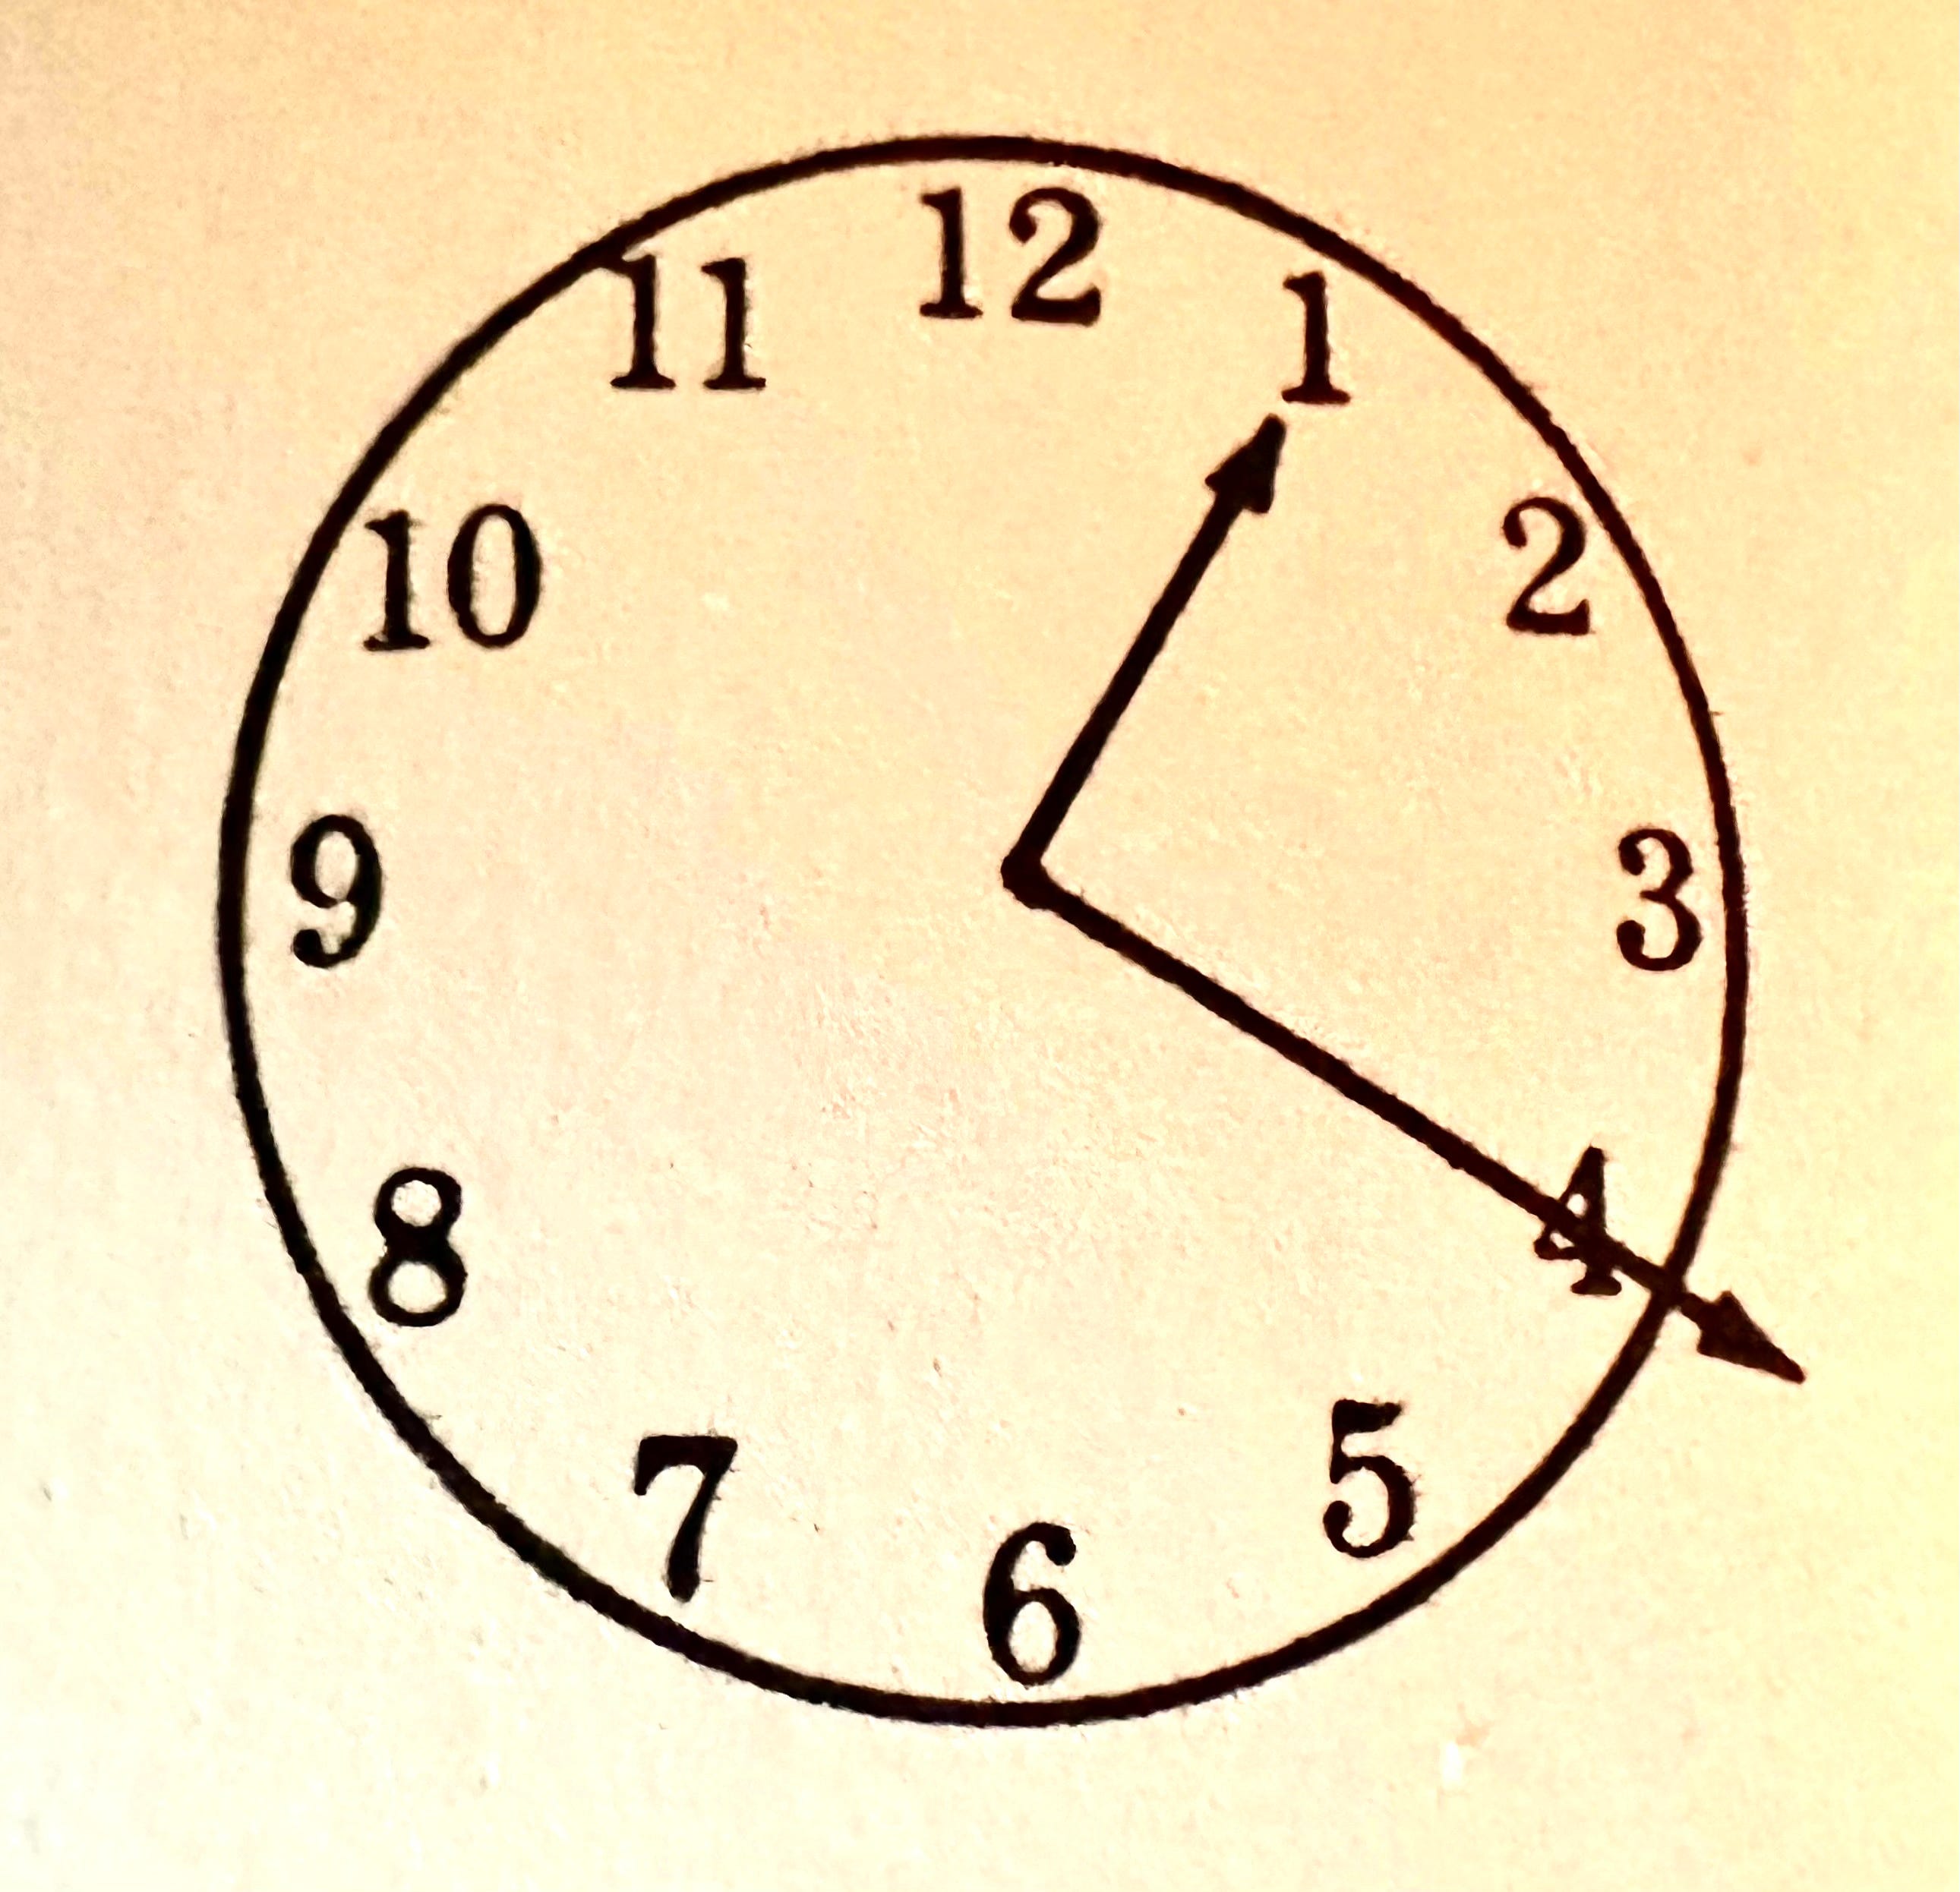
Step 8. Introduce after-before. This exercise uses only the hour hand. Draw it between any two numbers on the clock.
Say, “Now this is the hour hand. It is after one hour and before another hour. Which hour is it after? Well, which way does the clock move? That’s right it moves this way. So, it must be after the hour that just passed. Which one did it just pass? It passed the 2 so it must be after 2”. Engelmann suggests introducing other ‘after’ examples. Don’t introduce ‘before’ until Mary has mastered ‘after’. Then circle the hand around the clock slowly and say, “Ok, what number did I pass last? The hour hand passed 2 so it is after 2. What’s the next number it will reach? 3 that’s right 3. So, it is before 3.
This may be a difficult concept to teach so uses many examples of before and after until Mary can discriminate the hour before and the hour after. You could include before and after questions that do not involve the clock, “If the hour hand is after 7 it is before ____? If the hour hand is after 9 it is before ____?
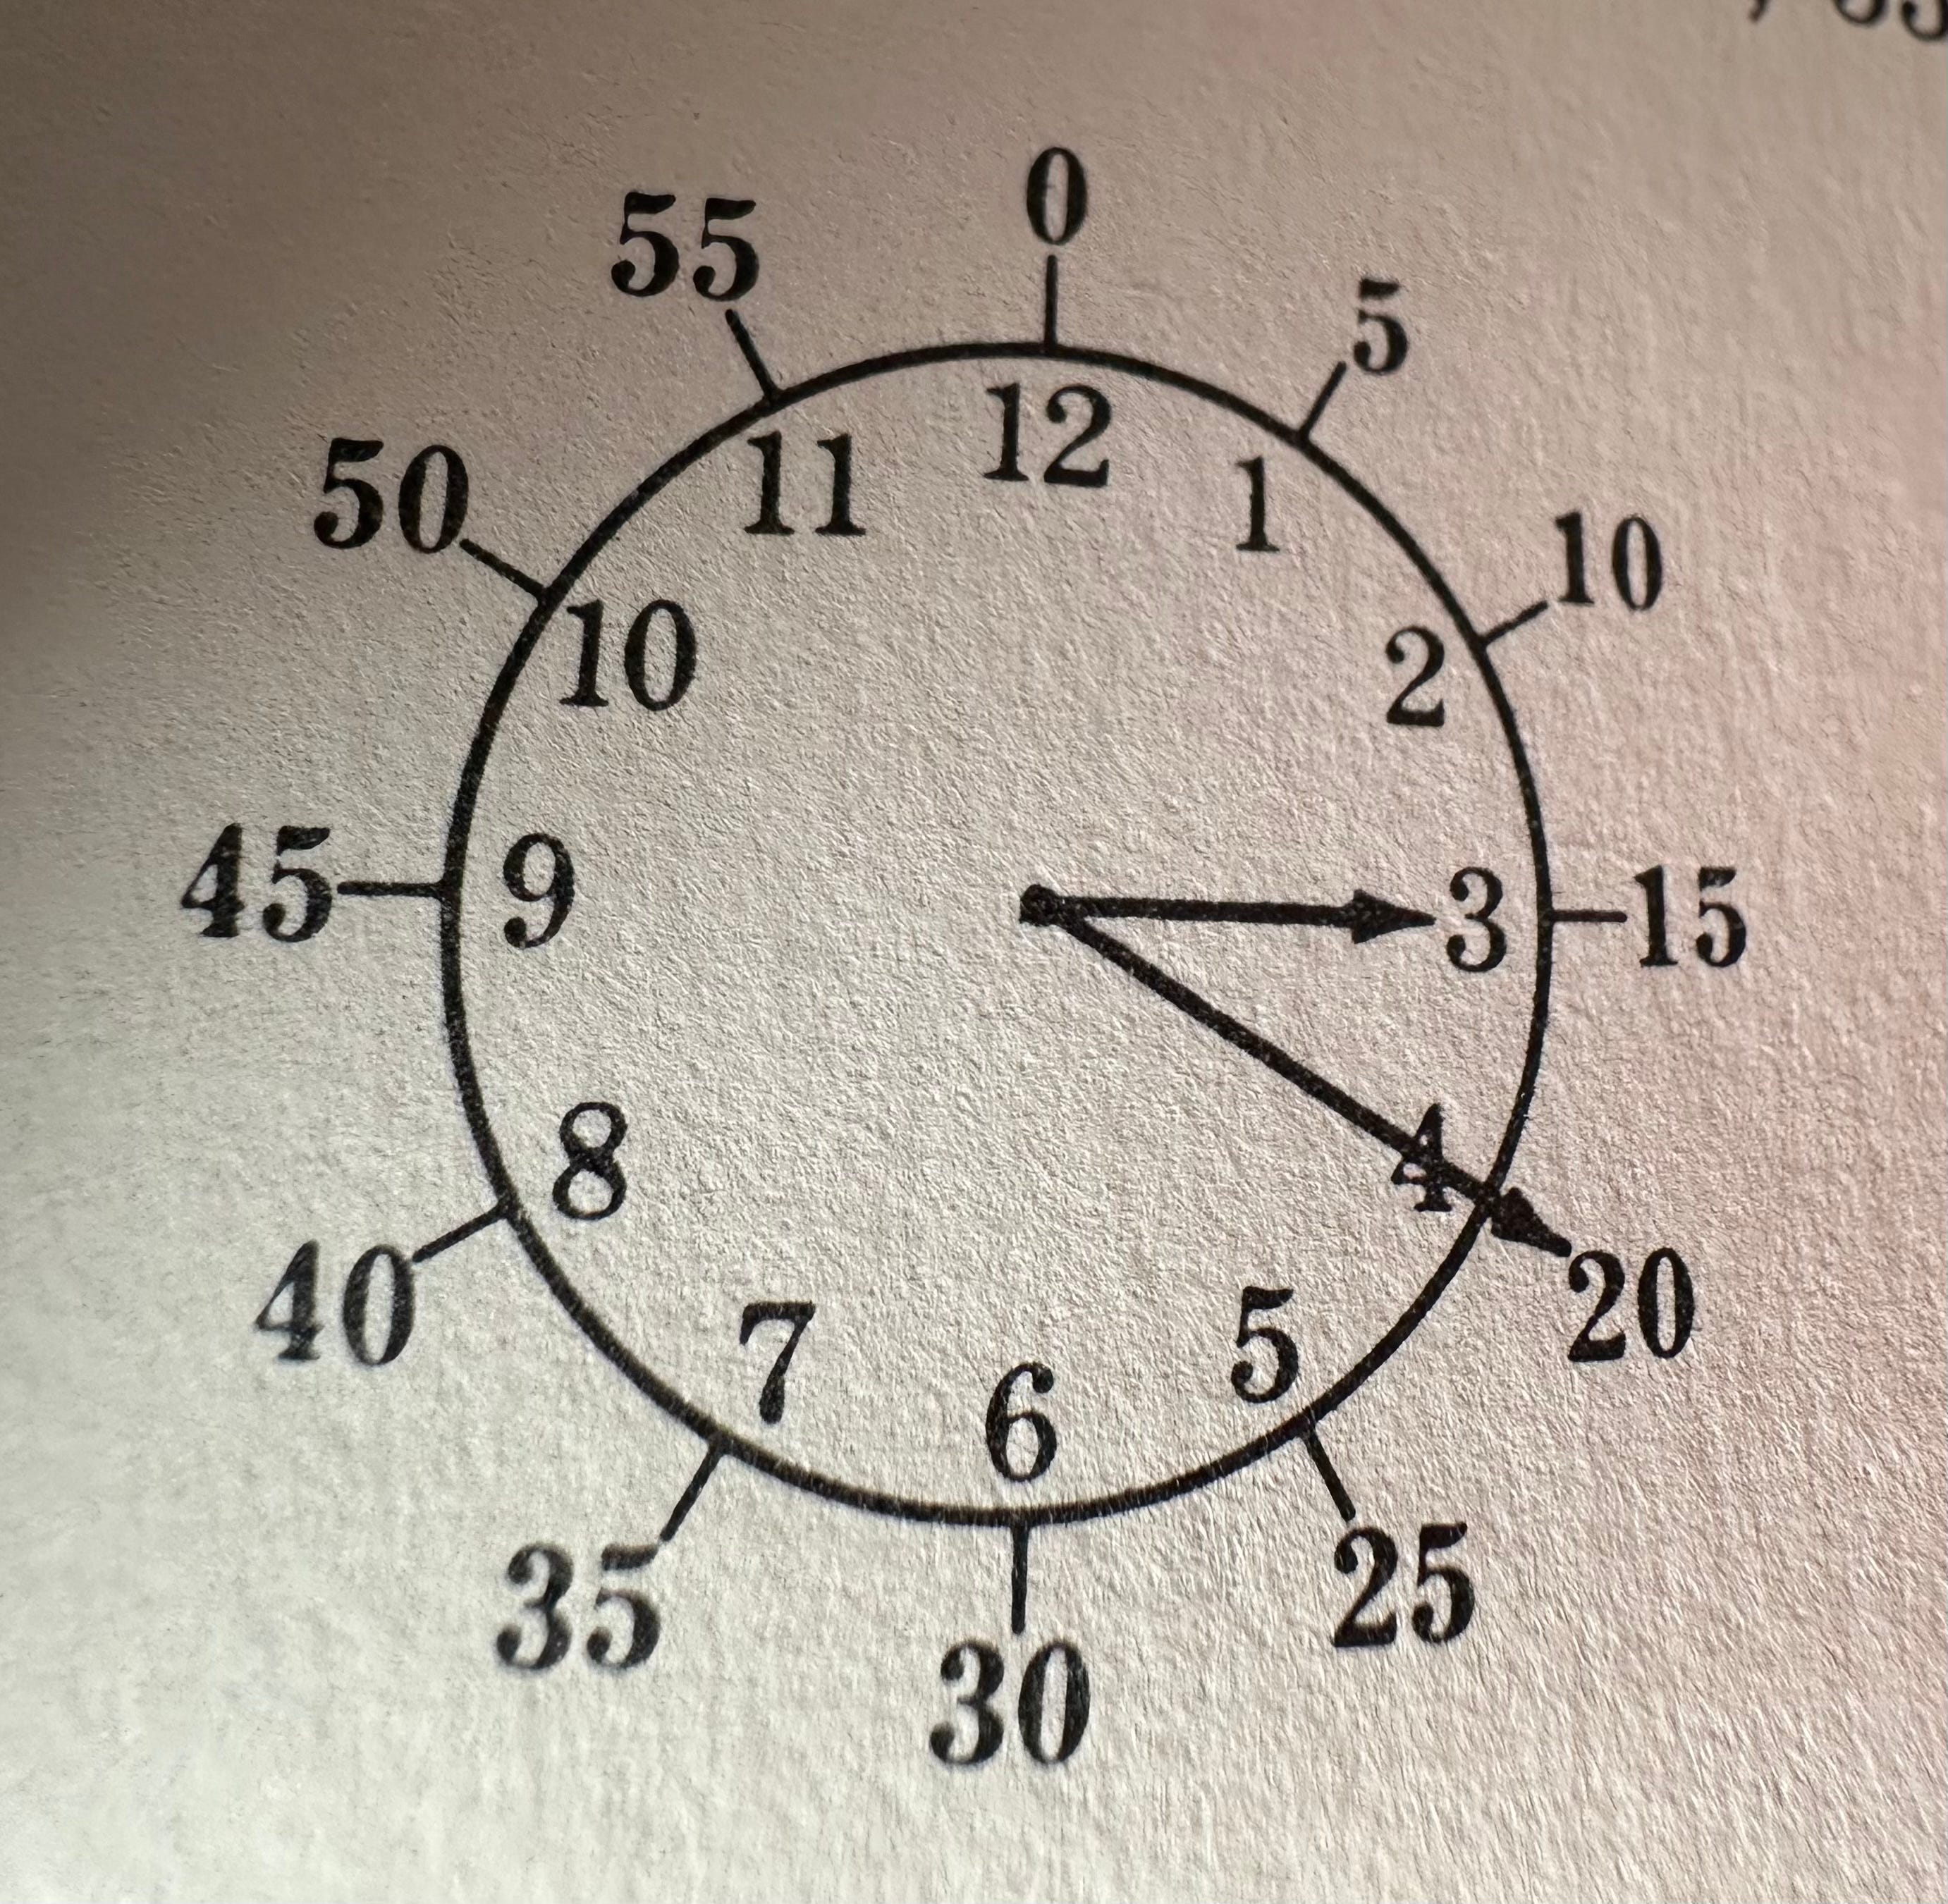
Step 9 Introduce before the next hour. The final step is teaching the rules for determining how to express the time in terms of before an hour. Introduce an operation that holds true under all circumstances.
A. Look at the hour hand. It is after the hour it just passed and before the hour it will reach next. In this example the hour it will reach next is 10, so it is before 10.
B. How much before 10? The hour hand is after 9 and before 10. How much before 10? To find out, touch the minute hand and say “Zero”. Then begin counting by fives in a clockwise direction until you reach the 12 on the clock. The number you will say when you reach 12 is the number of minutes before 10. Five (point to the 4), 10…15…20… keep going until you reach the top of the clock. So, the time is 45 minutes before 10. This method works with any example.
Step 10. Reduce the size of the minute hand. After the child has worked time-telling problems successfully, reduce the size of the minute hand but keep the difference between the two hands obvious. After the child can reliably tell the time counting by fives, introduce that the time can be 23 or 18 minutes after an hour. Do this by introducing dots or hashes between the numbers.
Engelmann suggests, “Have the child count in a clockwise direction to the number immediately preceding the hand. Then add on the dots, signing each a value of 1. “Yes, we’re up to 15 minutes after, but look, we haven’t reached the hand yet. So we have to count these dots. We’re at 15 so this one is 16… this one is 17…this one is 18. It’s 18 minutes after””.
This is the end of the telling time program. I usually continue and teach: quarter after, half past, and quarter of by drawing a clock divided into quarters and explain when to say half past, quarter past, and so on. Once the child learns to tell time these additional concepts come quickly.
Engelmann suggests that once Mary is proficient at telling time, you can reward her with her own watch to wear about town. However, it’s fine if you want to buy yourself a watch to reward yourself for all your hard work.
Reference
Engelmann, S., and Engelmann, T., (1966) Give Your Child A Superior Mind: A Program For The Preschool Child Simon and Schuster NY pp 237-244.
"It is quite difficult for a child to tell time."
Thank you! It's remarkable how often we take certain concepts for granted, almost self-evident, when in fact they are quite challenging for someone who isn't familiar with them.
This is a great post! It's a fantastic example of the process of *scaffolding*, the process of breaking a complex task into smaller, more manageable components. This is one of the most important skills of teaching, and one that is often neglected. This post shows how in detail how to scaffold, and it will repay many re-readings. Thank you!
Paul, thanks for recapping—re-outlining?—this procedures for teaching learners to tell time. Very nice.
A corollary: Not only can lots of people not tell time to the minute on an analogy clock, but if you asked lots of professors of education and psychology to demonstrate how to teach learners to tell time to the minute on an analog clock, they'd come up with lots of convoluted and kookie recommendations...you'd get a lot of illustrations of dysteachia really quickly.